Eggless Pav or Dinner Rolls
Note: This post contains affiliate links. As an Amazon Associate I earn from qualifying purchases.
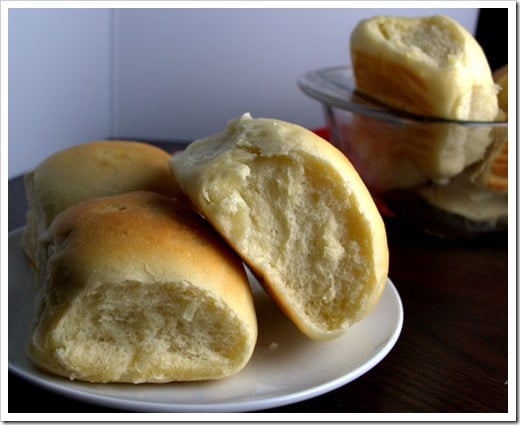
Here’s an easy recipe for Eggless Pav or Dinner rolls with detailed instructions making it very easy for you to make this soft Pav whenever you want to!
How many times should we try before we give up? Well, it took Edison 1000 attempts before he invented the light bulb..and all I had to was make dinner rolls or Pav (as we Indians call it).
I was getting a little frustrated that I was not able to nail this recipe after five attempts. Either the Pav would be too dense (that I could hurl it at my husband when I was really mad.. I am kidding, I don’t do that), or it would not brown properly or be spongy enough. I cannot guarantee you that my recipe will work because a lot depends on your oven, how well the yeast has been proofed, and a million other things.. What could possibly go wrong? I narrowed it down to these three reasons –
- Yeast not proofed – The yeast needs to double in size when proofed. Discard yeast in 6 months. Follow the directions in the packet! Do NOT use the yeast if it has not doubled up in volume and has not become frothy.
- Not brown – You really need to understand your oven here. I tried every option that was out there, like – spraying the rolls with sugar before I baked them or slobber them with butter. NONE of them worked. In the end, I realized I had to use the convection oven setting to get those dinner rolls to brown.
- Hard – did not give enough time for the dough to rise + the temperature was too high.
After a while, you will get to a point where you understand how your oven works and what temperature is ideal. Till then, don’t give up. “Failure provides the opportunity to begin again, more intelligently.” ~ Henry Ford
This recipe has been adapted from Shital Ashar’s Pav Recipe.
Eggless Pav or Dinner Rolls
Ingredients
- For Proofing the yeast
- 1 packet or 2 – 1/4 teaspoon active-dry yeast
- ¼ cup warm water
- 1 teaspoon sugar
- Rest of the ingredients
- 3 cups all purpose flour + extra flour for kneading
- 1 teaspoon salt
- 2 teaspoon sugar
- 3 tablespoon butter at room temperature
- 1 cup water
- Equipment
- Stand mixer or mixing bowl
- Parchment paper
- 9 x13 baking dish
Instructions
- Proof the yeast: Follow the directions in the yeast packet. Mine had the following instructions – For active dry yeast, the water temperature should be between 105 and 110 degrees for proofing. I used water from the refrigerator and heated it up in the microwave for 12 seconds to achieve the desired temperature. Add water to the yeast along with 1 teaspoon sugar. Wait for the yeast to double in volume and become frothy (took around 10-15 minutes). This is a very important step.
- Combine the ingredients for the dough If using a stand mixer, add flour, sugar (2 tablespoon),salt, butter, water and proofed yeast. Using the dough attachment, combine the ingredients at low speed till it forms a dough. This step takes around 6-8 minutes. If you are not using a stand mixer, knead it by hand for a good 8-10 minutes.Note: I did not completely melt the butter. To get cold butter to room temperature, microwave butter for 10-12 seconds.
- The texture of the dough should be soft like Chappati or Roti atta. Not sticky and not hard either.
- Dough rise process:Grease a bowl and place the dough in it. Lift the dough and place it back again the other way round so that both sides are oiled. Cover the mixing bowl with plastic wrap and let the dough rise and let it rest for an hour. The dough should double in size by then. If it has not, give it 30 more minutes.
- Shaping the rolls and letting them rise again :Knead it for 2-3 minutes and then divide the dough into 12 pieces ( I eye balled it). I shaped them into a round roll and slightly squished them.
- Line the 9X13 pan with parchment paper or spray it with cooking spray. Place the rolls roughly an inch apart and loosely cover them with plastic wrap. Allow them to rise till the double up in size and fill the pan approximately in 45 minutes or so.
- Preheat the oven:While the rolls are rising, preheat the oven to 450F. If using a convection oven, the temperature should read 425F.
- Bake the rolls:Bake the rolls for 10 – 12 minutes till the crust starts browning.Note:It took my oven all of 12 minutes for the crust to brown. Like I said, all ovens differ. Keep an eye starting 8 minutes and remove when you think the crust has browned to your satisfaction. Do not go over 15 minutes though because at that point the bread starts getting hard.
- Brush the rolls with butter and serve warm.
Disclaimer: Approximate nutritional information is provided as a courtesy and can vary depending on the exact ingredients/brands used. If you have health issues, please work with a registered dietician or nutritionist.