Plain Paratha (Flaky Indian Flatbread)
Note: This post contains affiliate links. As an Amazon Associate I earn from qualifying purchases.
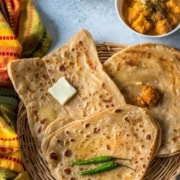
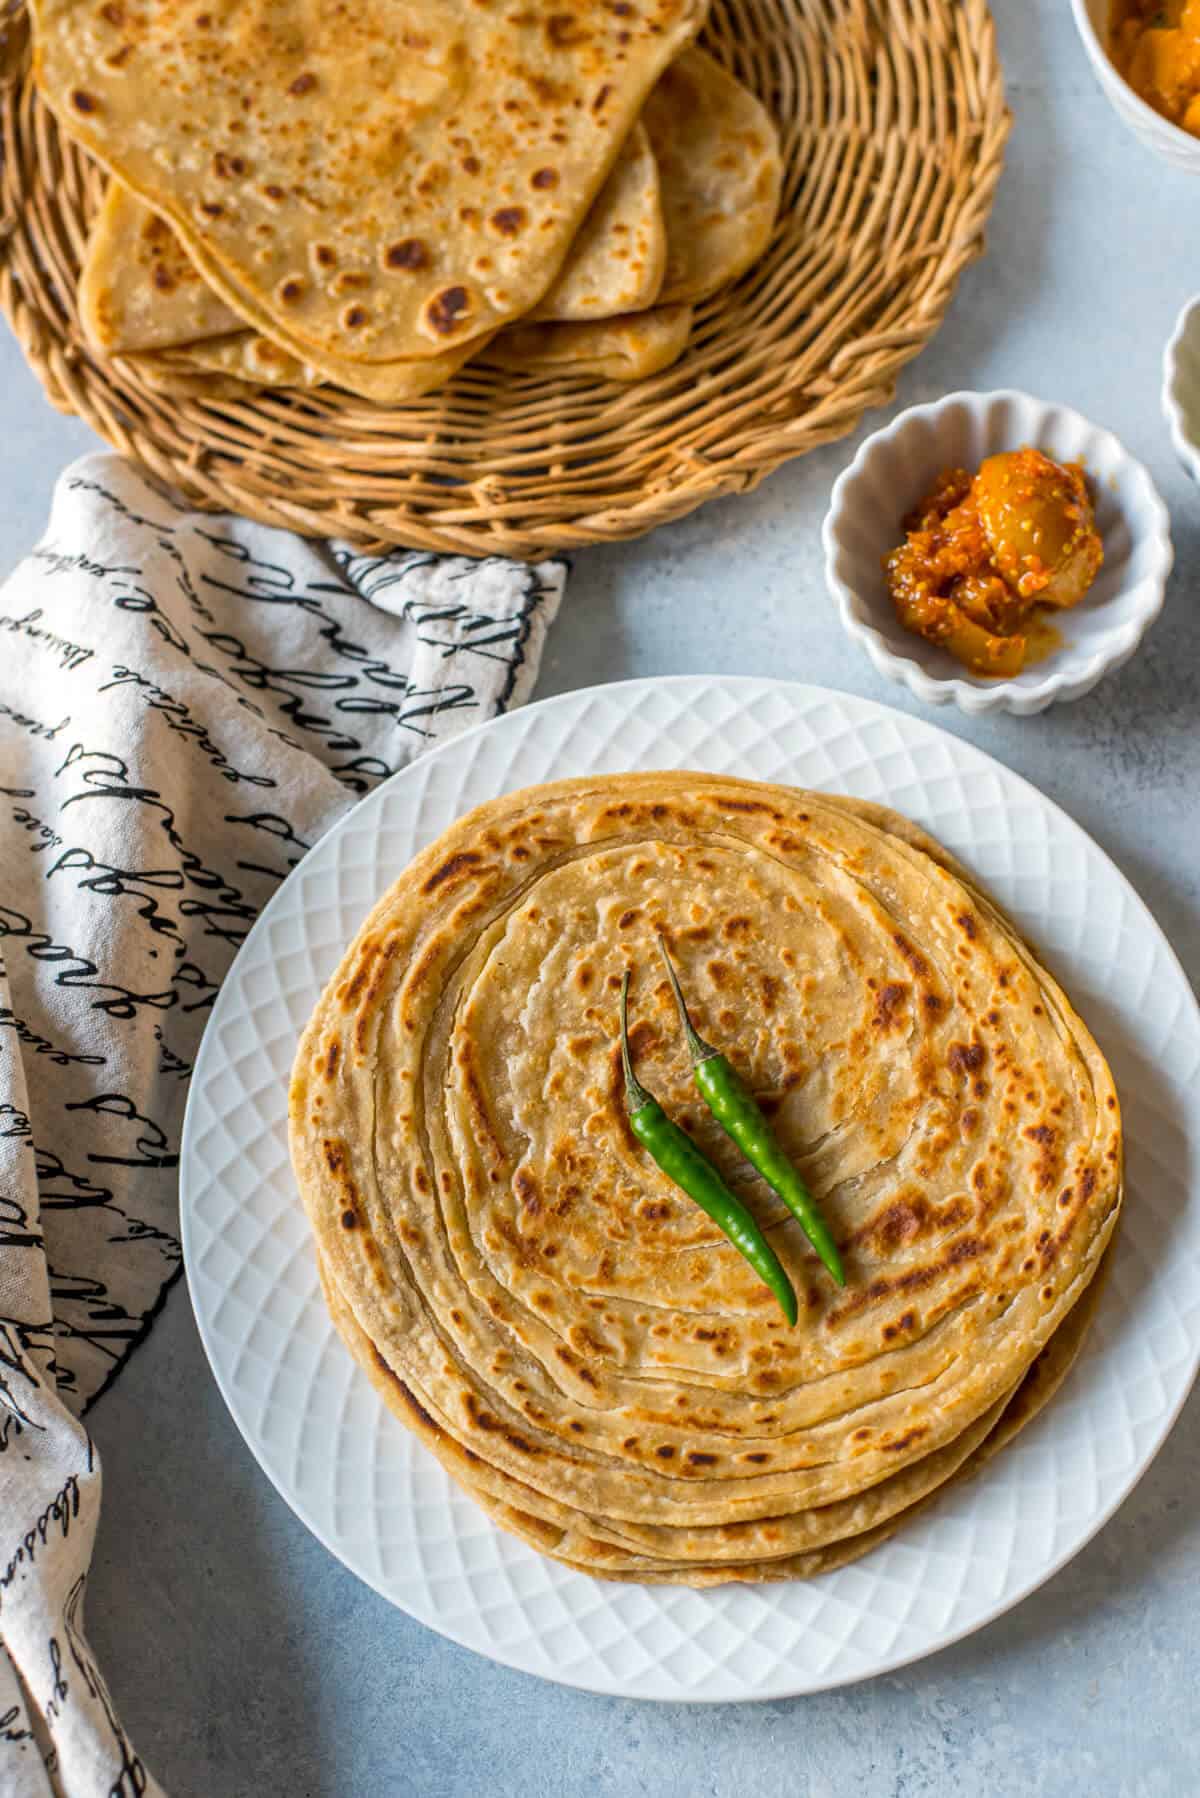
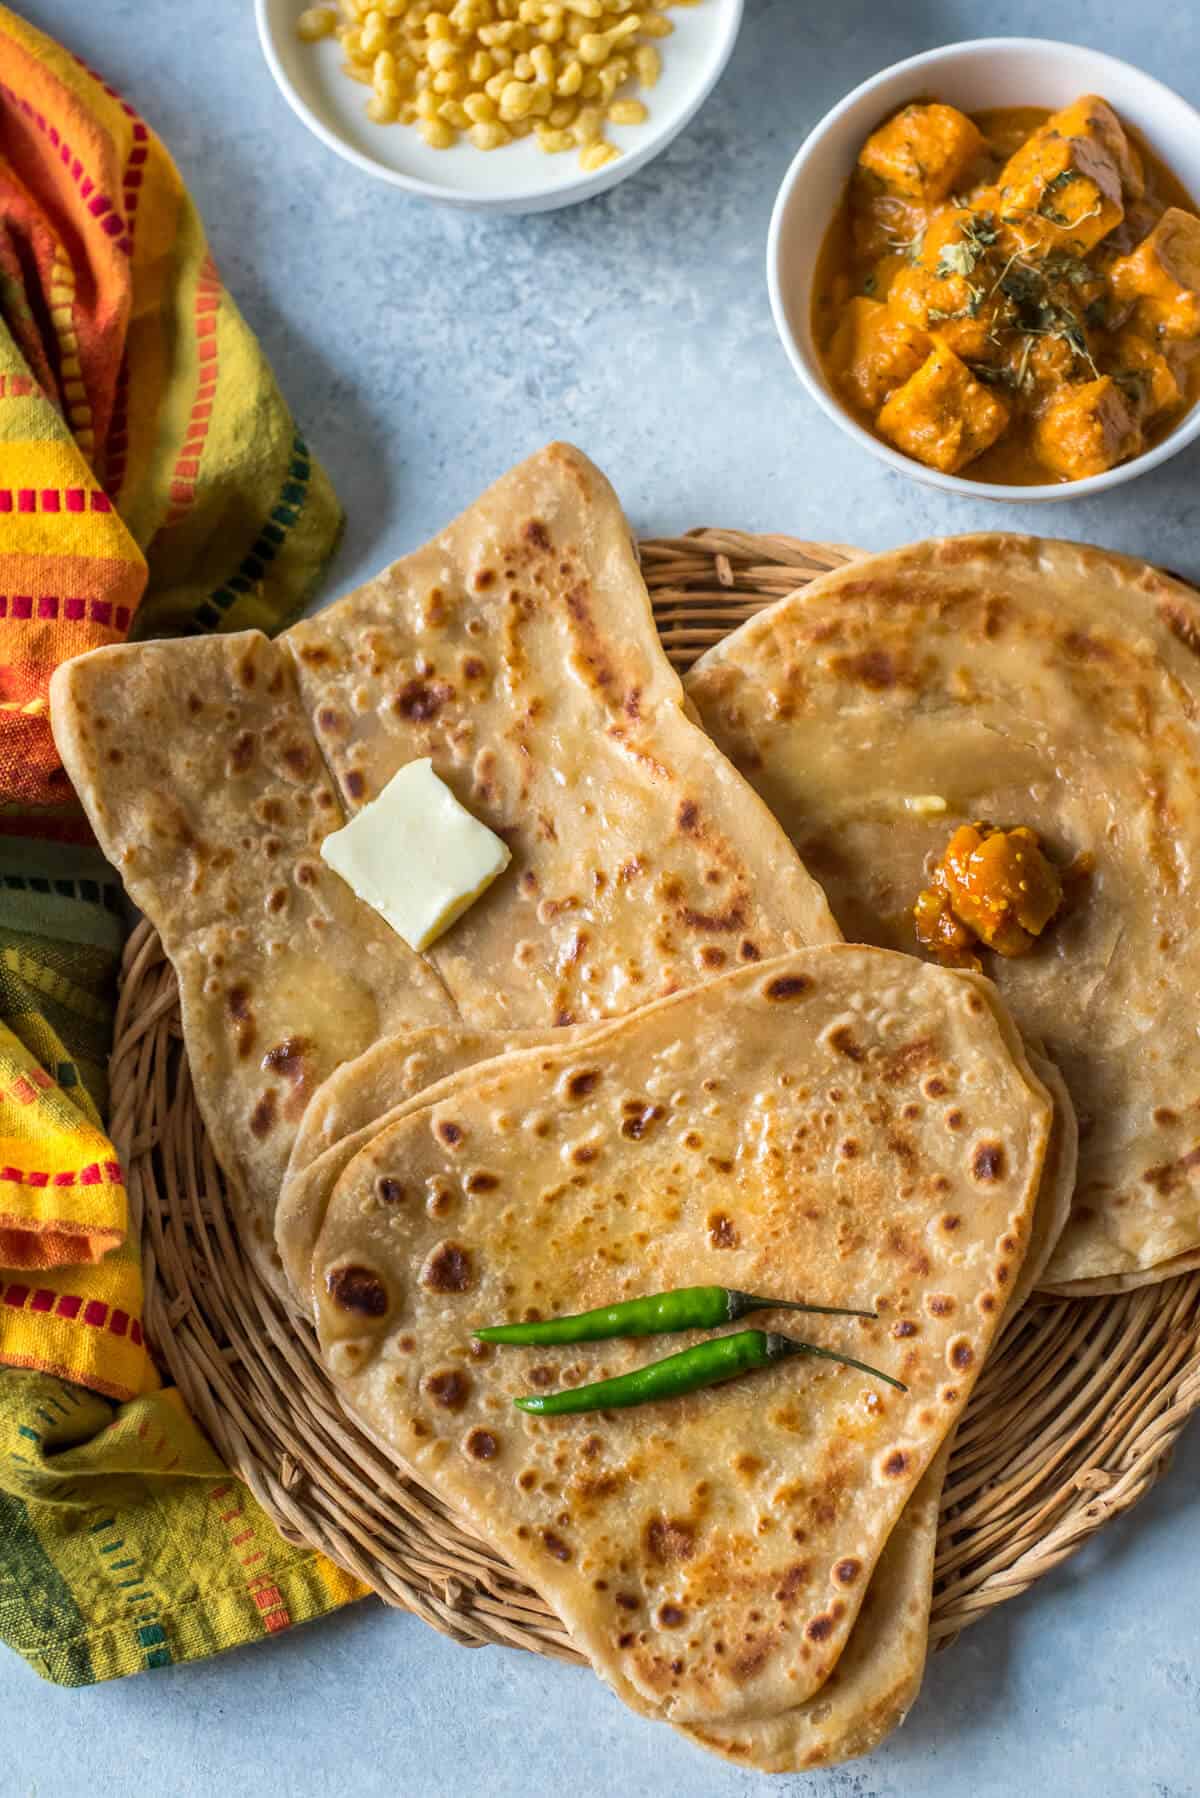
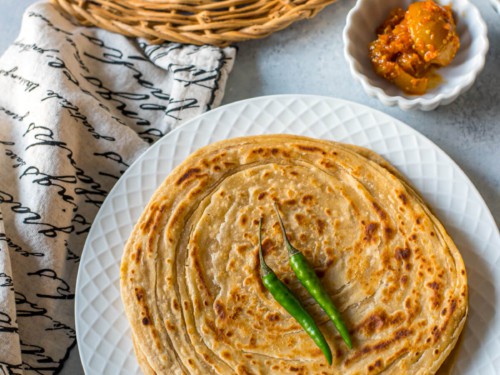
This step-by-step recipe will help you make the perfect parathas with crispy, flaky layers and golden brown spots. A North Indian staple, these plain parathas can be served for breakfast with butter, accompanied by a hot cup of chai and a side of pickle, or with curries to make a complete meal.

Growing up in a South Indian family meant that while idlis were a staple, parathas not so much. So when my friends would get this flaky flatbread for school lunch, it was a joyous moment for me.
While my friends loved the soft and pillowy texture of my mother’s homemade idli, I couldn’t get enough of the crispy (but soft) and flaky layers of her mother’s homemade parathas.
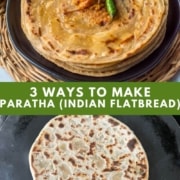
If you are a fan of this traditional flatbread like I am, you’ll love this post. The step-by-step photos will teach you how to make round, triangle, and square-shaped parathas in no time.
What is paratha?
Paratha is an unleavened bread that is popular in North Indian cuisine. It is made by making a dough using whole wheat flour (similar to that used for rotis). The dough is then rolled and then slathered with ghee and folded over to create many flaky layers.
Indian paratha has a similar effect to that of puff pastry or croissants, where the laminating and folding of dough in several successions allows the dough to develop a flaky texture with many layers of soft yet crispy bread.
Although plain parathas are often served with butter and a side of pickle for breakfast, they are also commonly served with curries to make a complete meal.
There are also two types of paratha: layered or stuffed. Layered parathas have spices or fillings added while making the dough, whereas stuffed parathas such as this aloo or paneer paratha have stuffings filled in during the rolling process.
History of the recipe
Paratha (pronounced pr·aa·thuh) is a common breakfast food and accompaniment in North Indian cuisine, although it originated in Peshawar, which is located in Pakistan.
Parathas, like much of Indian cuisine, were influenced by the surrounding region, with the recipe being adapted to meet the needs of the area. Parathas soon spread all over the Northern region of India and became an integral part of their cuisine and, thus, their culture.
While this popular Indian flatbread is most often known as paratha, there are many other types of paratha. Even plain paratha can go by a variety of names, including the following:
- Roti paratha
- Tawa paratha
- Parantha
- Parotta
- Laccha paratha
Difference between paratha, roti, and naan
The biggest difference lies between naan and both paratha and roti.
You see, paratha and roti are made with very similar dough, and both are made with whole wheat flour, while naan is typically made with white flour. Both roti and paratha are unleavened, while naan is a leavened bread.
Both paratha and roti are everyday, common flatbreads that are prepared to serve with simple daily meals like dals and curries. Roti is consumed widely throughout India, while paratha is specific to North India.
In contrast, naan is commonly served in restaurants as an accompaniment to curries. It is more of a special occasion bread, especially since it is made with refined flour (maida), which is not considered healthy, and also uses yeast – which isn’t as common of an ingredient in Indian households as it is in America.
Finally, the texture is what sets each of these popular Indian flatbreads apart.
Naan has a thick, bubbly texture that is soft and slightly yeasty. Roti (also known as chapati) is mild, soft, and pliable (if you master the technique). While paratha is flaky, crispy, thicker than naan, and layered with ghee.
Here’s what you need to make the recipe
Ingredients
- Whole wheat flour – I prefer either Aashirwad whole wheat atta or Sujata chakki atta.
- Salt – a small amount of salt is added to the dough to provide flavor.
- Oil – I used avocado oil, but you can use another neutral flavored oil like vegetable oil.
- Water – You will need enough water to form a soft dough, which should be at room temperature for the best results.
- Ghee – This is used during the rolling of the dough, as you smear each layer with melted ghee to create the signature flaky layers.
Be sure to check out the full recipe and ingredient list below.
Tools
You’ll need the following equipment to make parathas
- [Optional but helpful] Stand mixer or food processor
- Metal / Marble / Wood base with a rolling pin (or Chakla Belan in Hindi)
- Tava / Griddle
- Spatula / Turner
- Paper towel
TIPS
- Knead the dough until it is smooth, soft, and pliable.
- To fix stiff dough, sprinkle a spoonful of water and knead. Add more water as needed until the dough is neither stiff nor sticky.
- Sticky dough? Sprinkle a spoonful of dough and knead. Add more flour as needed until the dough is not sticky.
- Rest the dough to allow time for the gluten to form. This makes it easier to roll out the dough and yields softer parathas.
- Make sure to dust off the dry flour from the rolled dough before frying, or it dries up and turns hard.
- Before storing it in an air-tight container or while packing it for lunch, let the paratha cool down for 5-6 minutes to prevent it from being soggy.
Note: Don’t forget to turn your exhaust fan on when you are making parathas, or else your smoke alarm may go off.
Variations to try
- Spice it up – Make masala paratha by adding 1/2 teaspoon of these spice powders – chili powder, coriander, and cumin powder while making the dough.
- Ajwain paratha – Ajwain or carom seeds aid digestion. Add 1/2 tablespoon of ajwain (carom) seeds for every cup of whole wheat flour while making the dough and make the paratha as usual.
- For a vegan version, use oil instead of ghee.
How to prep ahead
If you would like to prep ahead of time, I recommend preparing the paratha dough and cooking the actual parathas on the day you plan to serve them. You may store your dough in an air-tight container for up to 3 days in the refrigerator or frozen for up to 1 month.
Before rolling out your parathas, bring the dough to room temperature. Then divide, roll, and cook.
Storage tips
Refrigerator – Allow your paratha to cool for 5-6 minutes before transferring them to an airtight container. If you can, place parchment paper in between the layers to prevent sticking. They will store like this in the refrigerator for 3-4 days.
Freezer – Make sure your cooked paratha is completely cool before transferring it to the freezer. Separate each one with parchment paper (to prevent sticking) and place it in a freezer bag or container. They will store like this for 2-3 months. Heat to serve.
Reheat – For refrigerated parathas, reheat in a microwave (15-20 seconds) or reheat in a tava / skillet kept over medium heat. If parathas are frozen, use a tava/skillet to reheat for best results.
Serve it with
You can serve these crispy and flaky parathas with either ginger tea or masala tea., with a side of pickle or raitas as breakfast or brunch. You can also make them part of your main course accompanied by –
- Mango lassi or Sweet lassi.
- Instant Pot dal makhani – A creamy and delicious Punjabi lentil curry that graces the menus of Indian restaurants worldwide.
- Methi malai matar with paneer – An unforgettable vegetarian dish made with fresh fenugreek leaves, green peas, and soft chunks of paneer.
- Langarwali dal – a creamy and satisfying mixed lentil curry that cooks effortlessly in the Instant Pot.

Frequently asked questions
While paratha and parotta are very similar and share a similar crispy and flaky texture, they are quite different. The biggest difference is that parotta is made with maida flour, which is refined and higher in gluten than the traditional whole wheat flour that is used to make paratha. This gives it a thicker, softer, and doughy consistency when compared to paratha.
The best oil for making homemade paratha is any cold-pressed, neutral-flavored oil. Avocado is an oil that works very well, thanks to its high smoke point and neutral flavor.
Homemade paratha is always made with whole wheat flour. Some restaurants may mix all-purpose flour in the dough for a lighter flavor and texture.
You can use unsalted butter, but ghee is the healthier option, and I think makes the paratha taste better. If you have the time, you can clarify your butter which will give you similar results to ghee.
To make soft parathas, it is important to dust off the excess flour before frying them. If not, the flour dries up the paratha making it hard.
If you would like to pack your paratha for lunch, use oil instead of ghee since ghee solidifies. Also, let the parathas cool a bit before packing them, or the steam will make them soggy.
While paratha is a delicious North Indian staple and (like roti) is made with whole wheat flour, roti is a healthier option since it can be made with less ghee or oil.
Other traditional flatbread recipes to try
If you enjoyed this simple and flavorful recipe for plain paratha, you must try a few of my other paratha recipes, as well as some of my other Indian flatbreads. Here are a few of my favorites:

Paratha recipe
Ingredients
- 3 cups whole wheat flour
- ½ teaspoon salt optional
- 2 tablespoons oil (avocado or vegetable) + 1/4th teaspoon oil
- 1.5 cups water or as needed, at room temperature
For rolling out
- ¼ cup whole wheat flour for rolling
- ½ cup melted ghee (as needed)
Instructions
Making the dough
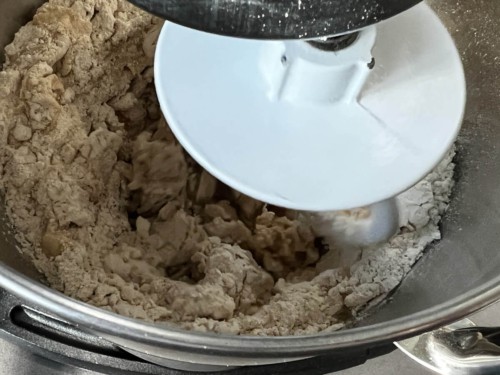
- Combine 3 cups of wheat flour, salt, and oil with 1 cup of water in a large bowl and start kneading. Add water in small increments and knead until the dough comes together like a ball.

- Add 1/4th teaspoon oil to the dough and knead till the oil is absorbed.
- If the dough is sticky, sprinkle approximately 1/4 teaspoon wheat flour (or more if needed) on the dough and knead again to form a dough that is not sticky. The dough should be supple and soft.
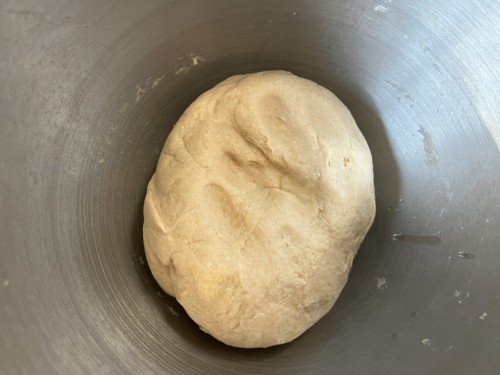
- Cover the dough and set aside for 15-20 minutes.
- Put 1/4 cup of flour in a medium sized container or a plate. Set it aside. We will need this flour while rolling out the dough.
Making parathas
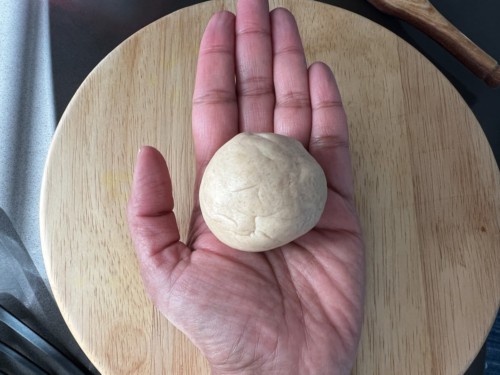
- Pull a small piece approximately the size of a golf ball from the dough. Place the piece between the palms of your hands and shape them into a ball.
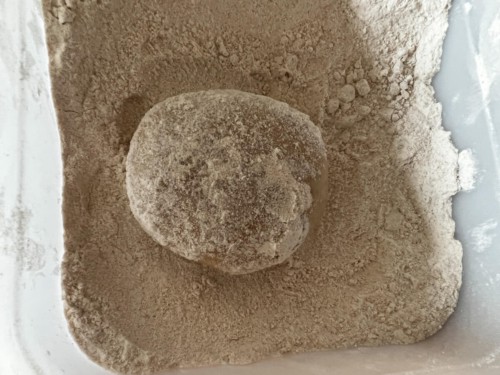
- Flatten the ball and cover both sides with flour.
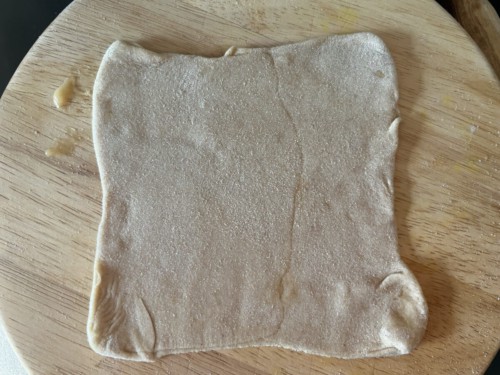
- Roll out the flattened ball into a circular shape (approximately 6 inches in diameter).
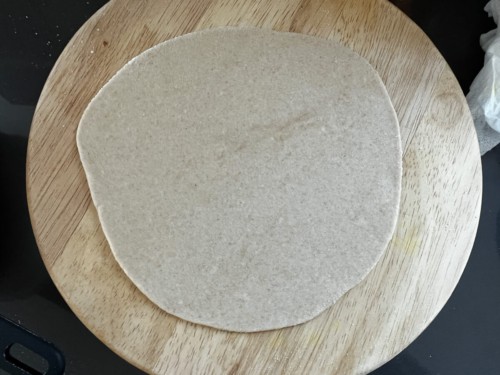
For square parathas
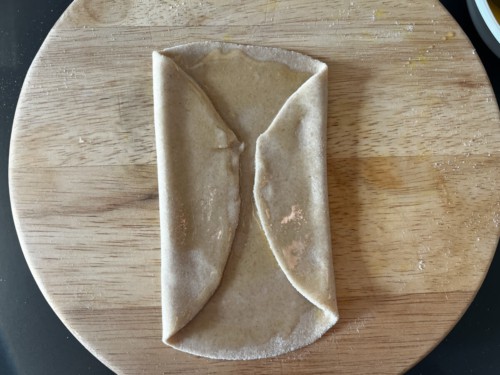
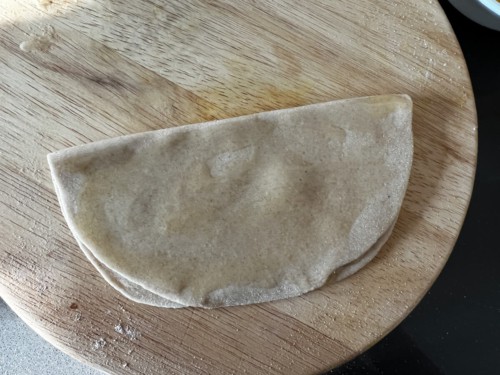
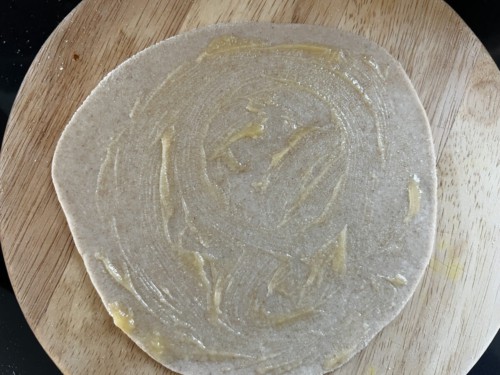
- Smear the surface of the rolled-out dough with ghee. Take 1/3 portion of the rolled dough from the left side and fold towards the middle. Now fold 1/3 portion from the left till the folds overlap slightly. Brush it with ghee.
- Now fold the top and bottom portion of the rolled dough towards the middle creating a square.
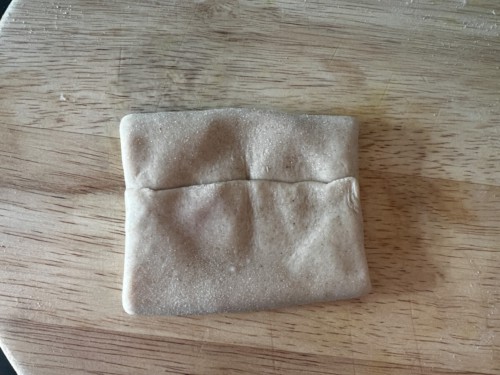
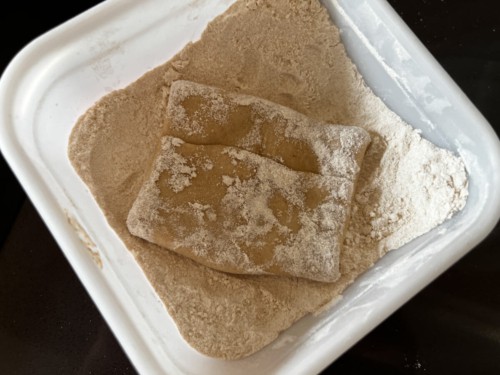
- Place the square-shaped paratha in a small container filled with flour and cover both sides.
- Use the rolling pin to roll it evenly into a square shape paratha using as little pressure as possible.
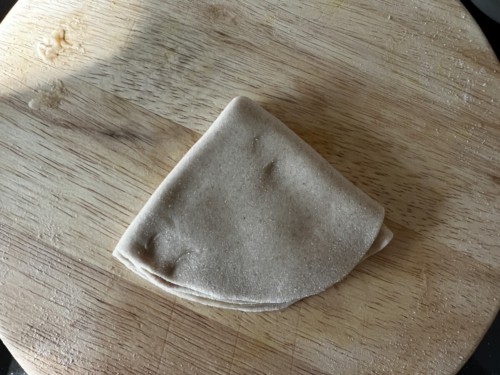
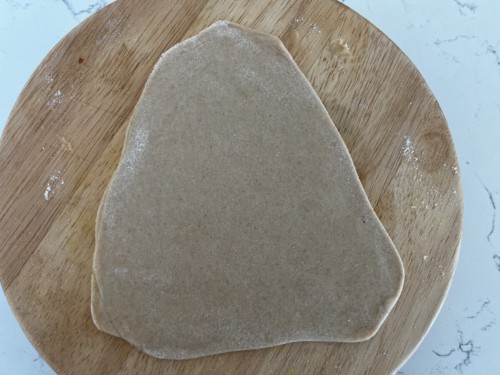
For triangle parathas
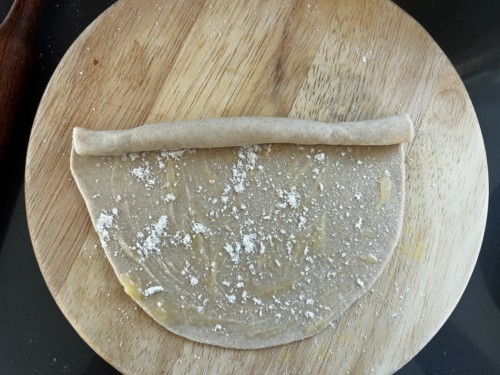
- Smear the surface of the rolled out dough with ghee. Fold it into half and brush it with ghee again.
- Fold again into half such that it resembles a triangle.
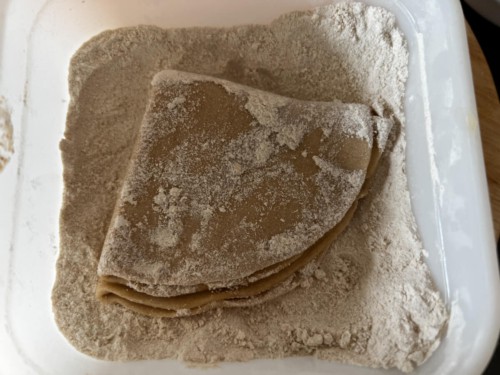
- Place the paratha in a small container filled with flour and cover both sides.
- Use the rolling pin to roll it evenly into a triangular shape paratha using as little pressure as possible
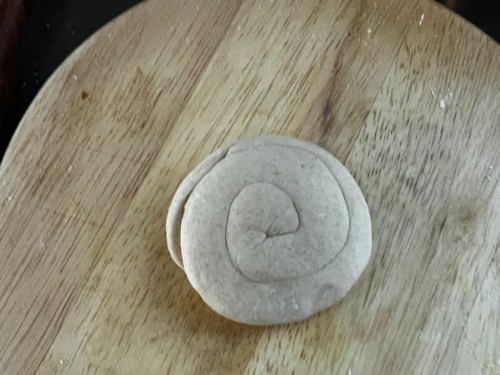
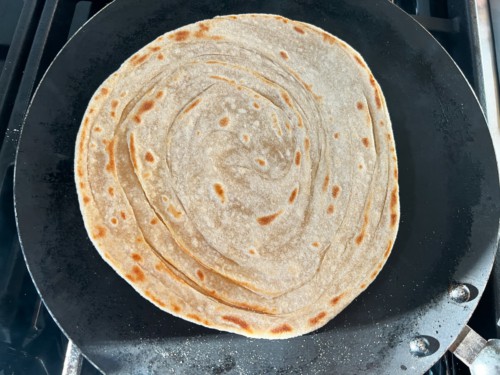
For round parathas
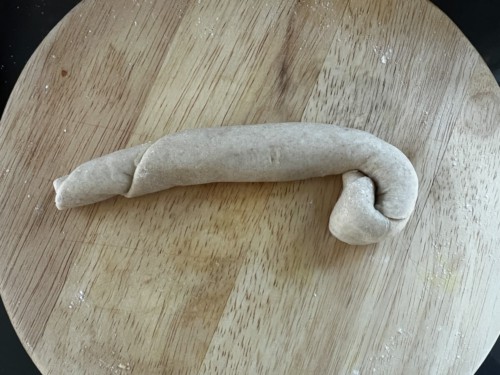
- Smear the surface of the rolled-out dough with ghee. Sprinkle some flour evenly.
- Start from one end of the circle and roll towards the other until it resembles a log.
- Roll the log inward into a coil. Once you reach the end, pull the edge and tuck it under the coil.
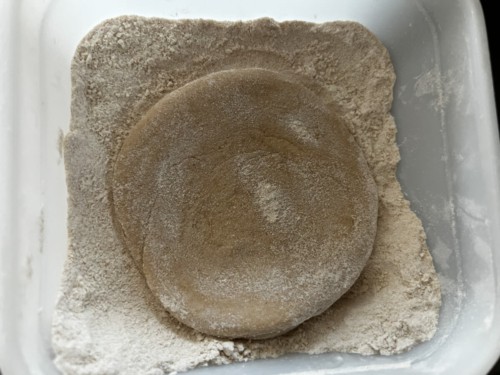
- Flatten the coil until it looks like a disc. Dip the flattened disc in the flour.
- Place the disc in a small container filled with flour and cover both sides.
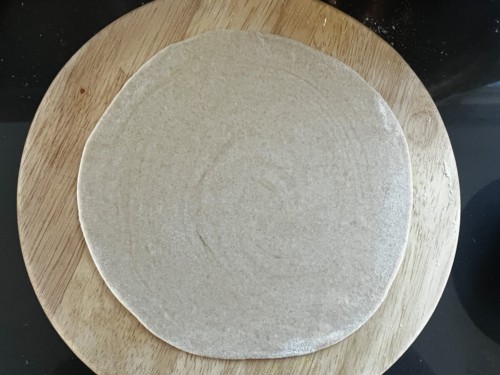
- Roll out the flattened ball evenly into a circular shape (approximately 7-8 inches in diameter). Dust more flour as needed to help with the rolling.
Cooking paratha
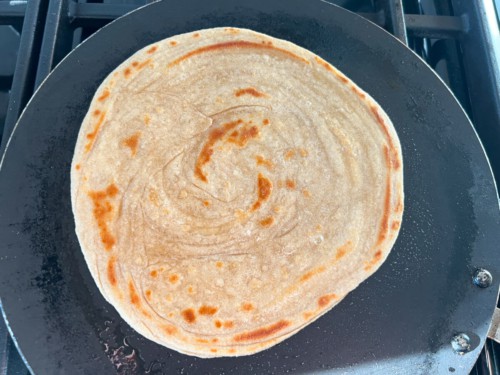
- Heat a pan / tawa over medium-high heat.
- Dust off excess flour from the paratha by placing it on your palm of one hand and then flip it on the palm of your other hand. Repeat this process 3-4 times.
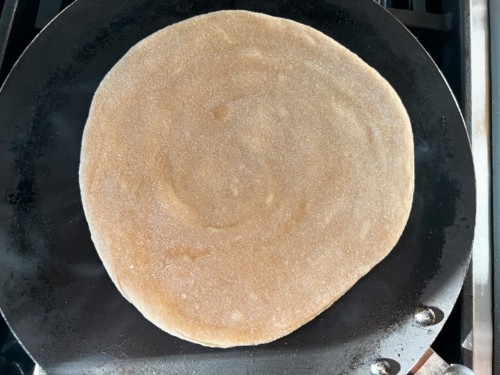
- Place the paratha in the hot pan. Cook the paratha until small bumps form on the surface (approximately 1-2 minutes).
- Flip the paratha onto the other side. Cook for 30-40 seconds or so until you see brown spots. Smear it with ghee and flip it.
- Cook for 20-30 seconds, then brush the side facing up with ghee. Use a spatula to press down the paratha so that it evenly cooks.
- Flip it and cook it for another 15-20 seconds while pressing the paratha down with the spatula.
- Transfer the paratha to a plate lined with paper towels. Repeat this process for the rest of the dough.
- Serve it hot with dal, vegetable or chicken curry.
Notes
- To fasten up the process, roll out the next paratha as one cooks in the pan.
- Make sure to dust off the excess flour from the paratha before you cook it. This prevents the paratha from getting hard.
- Before storing it in an air-tight container, let the paratha cool down a bit so as not to make it soggy.
Disclaimer: Approximate nutritional information is provided as a courtesy and can vary depending on the exact ingredients/brands used. If you have health issues, please work with a registered dietician or nutritionist.