Easy Air Fryer Garlic Bread (from scratch)
Note: This post contains affiliate links. As an Amazon Associate I earn from qualifying purchases.


This homemade garlic bread baguette made in the air fryer is crispy, perfectly toasted, and ready in minutes. Make sure you make a double batch because this cheesy, buttery garlic toast will disappear in seconds!
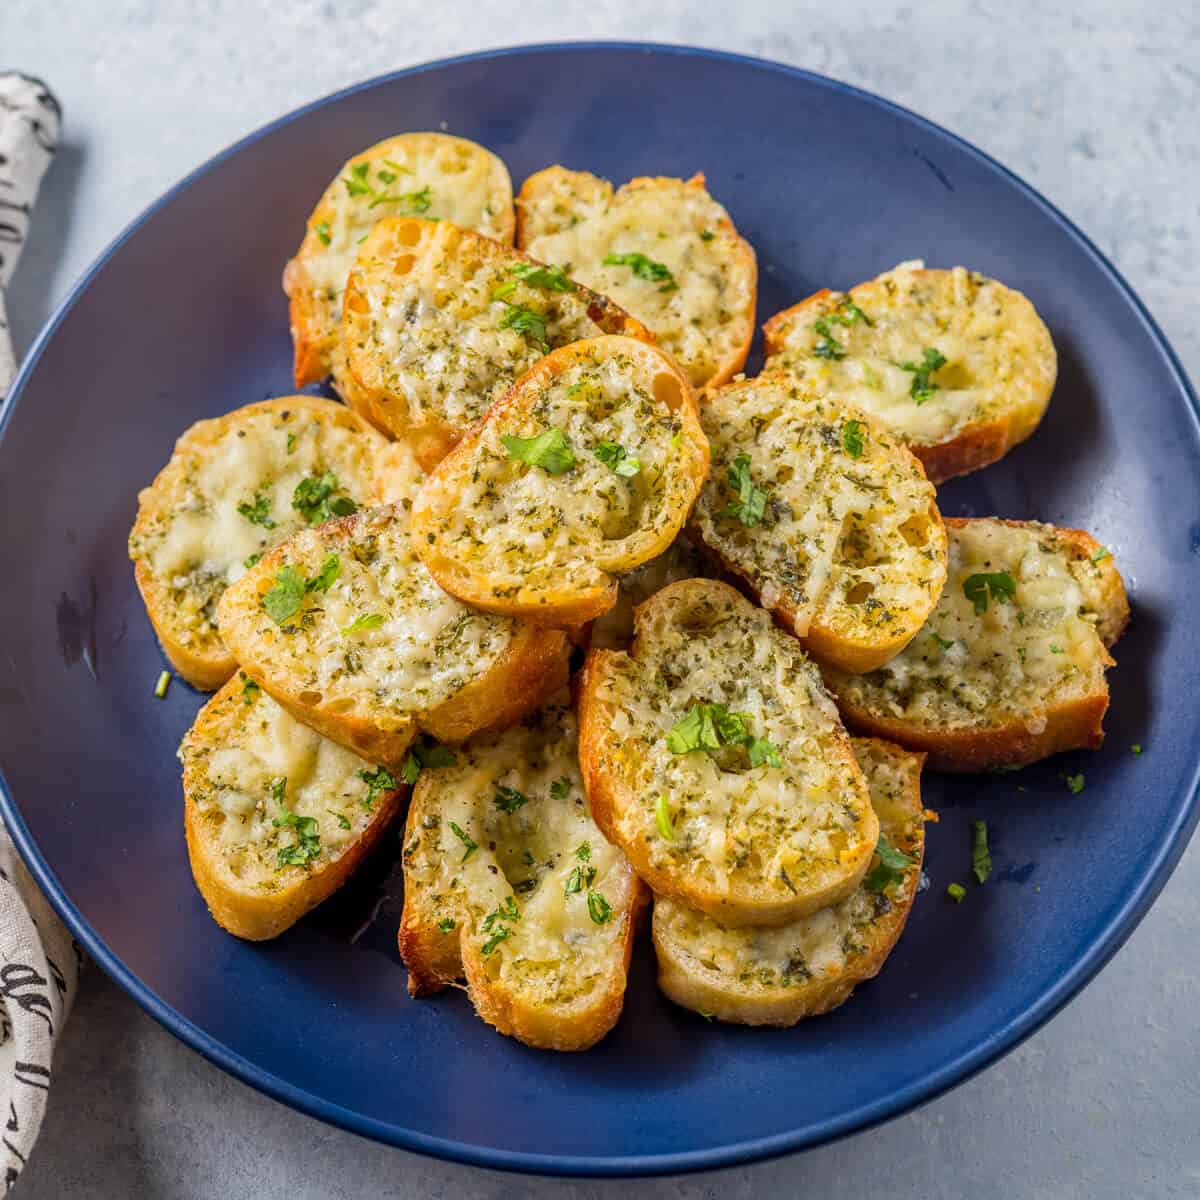
Garlic bread is a popular appetizer worldwide, and it’s no surprise. What’s not to love about this buttery, cheesy garlic toast with a crisp crust? The simple yet bold flavors compliment a variety of dishes, and it’s always a hit with picky eaters.
This easy recipe can be made without an oven and is made from scratch using baguettes, butter, garlic, and a few pantry ingredients.
Depending on your preferences, you can make this air fryer garlic bread with or without cheese. If you’re serving guests, I recommend doing half with cheese and half without. That way, everyone can choose their favorite option.
I prefer to make garlic bread with baguettes, but you can use any kind of bread you have on hand – including sandwich bread!
Reasons to love this recipe
- Takes just 5 minutes, making it the perfect easy appetizer or side for all of your favorite meals.
- You can customize the flavor according to your tastes or dietary needs. Make it more cheesy, add more garlic if desired, or use vegan options if desired.
- Repurpose leftover bread – You can make this delicious garlic bread with leftover bread too!
- Freezer-friendly recipe – This garlic bread recipe is also freezer-friendly and can be reheated easily in the air fryer or the microwave.
- Easy make-ahead side dish – You can make it ahead to save time or to have an easy appetizer on hand for last-minute meals, holiday dinners, or super bowl parties.
History of the recipe
While the common belief is that garlic bread is an Italian dish, it is an American invention. Although it pairs deliciously with Italian-inspired flavors, it’s supposedly an Americanized version of Italian bruschetta.
This popular appetizer started to gain popularity during the 1950s and has only become more popular with time. Its popularity has spread worldwide and it is considered a delicious companion for a variety of popular dishes, including pasta, soups, and salads.
Garlic bread is made from artisan-style bread, most often a baguette or ciabatta, and spread with garlic butter, which is made from softened butter, minced garlic, salt, and chopped parsley. Then, the bread is baked until lightly toasted and bubbly. Some prefer the addition of cheese, so it is often included.
Garlic bread (pronounced gaar-luhk bred) is also known as garlic toast and sometimes Texas toast. The only difference is that Texas toast is made from thickly sliced sandwich loaves, while it is typically made from either Italian or French loaves.
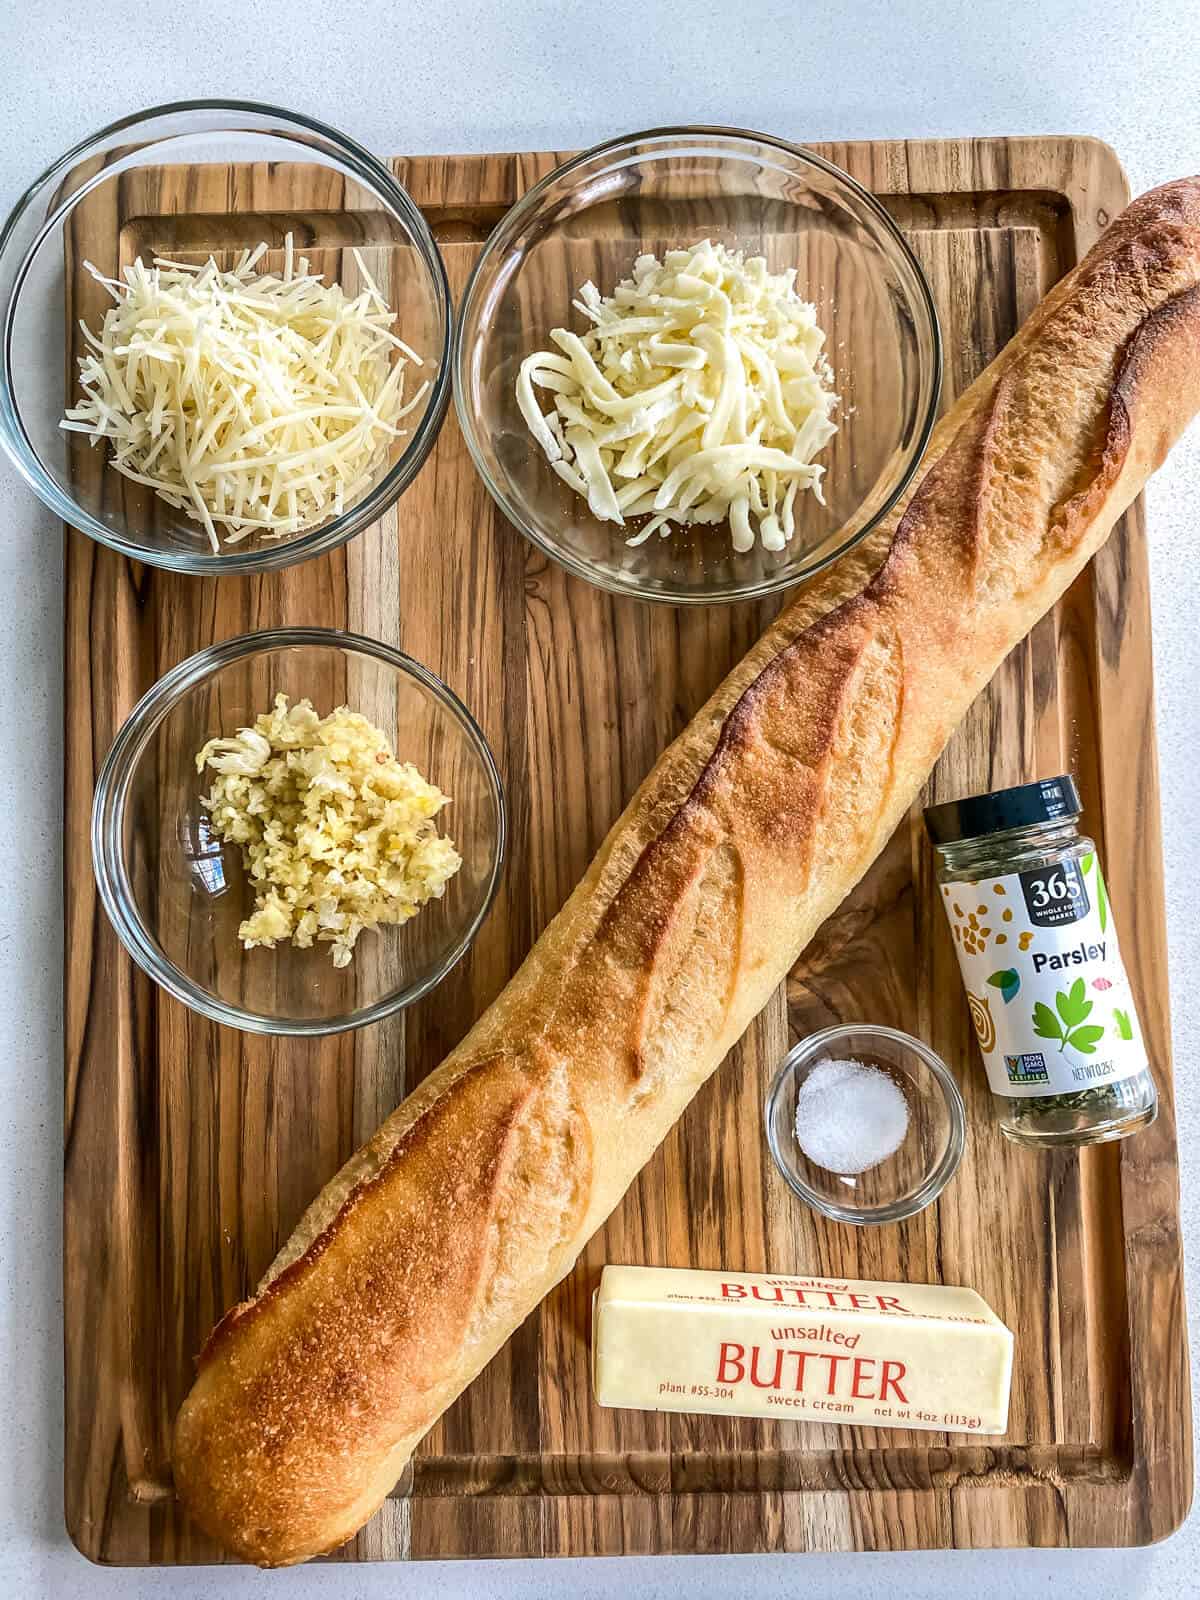
Here’s what you need to make the recipe
Ingredient notes/swaps
- Bread of your choice – French baguette or Italian ciabatta is perfect for this recipe. Use thickly sliced bread for a Texas toast garlic bread. Some even make it with sourdough and brioche bread.
- Garlic – freshly minced is the best!
- Parmesan cheese – freshly grated or store-bought shredded ones will do.
- Butter – Unsalted works best here since it allows you to have more control over the saltiness of the final result. If you want to make vegan garlic bread, you can substitute the butter for olive oil.
- Mozzarella cheese – If you like your DIY garlic bread to be extra cheesy, mozzarella is a perfect choice.
- Fresh or dried parsley
- Salt as needed
- Freshly ground black pepper for serving if desired.
Be sure to check out the full recipe and ingredient list below.
Tools
You’ll need an air fryer to make this recipe. Here are the two that I recommend
- Basket style (Phillips 7 QT, 1725W) – easier to flip food but cooks a smaller amount (2-3 servings).
- Oven-style (Ninja Dual Heat Air Fryer – 1800W) – The oven-style ones usually take more space but what’s unique about this Ninja air fryer is that it flips vertically for easy storage on the countertop. Most importantly, it allows you to cook six chicken breasts, 2-lbs roast, or 4-lbs of fries – perfect for families of 4 or more.
TIPS
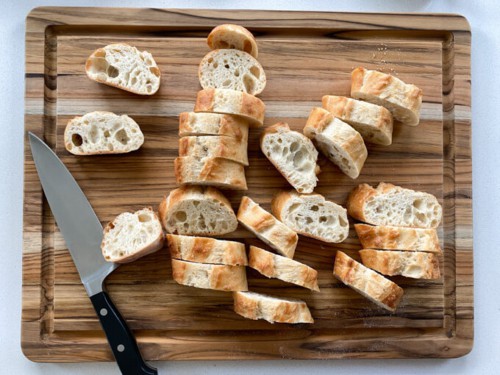
- Slice the baguette the same size for even cooking.
- Forgot to soften the butter at room temperature? No worries! Microwave the butter in 10-second intervals until it softens (not melts!). It should take about 25 seconds.
- No overcrowding – Arrange the bread in a single layer in your air fryer basket and cook in batches if needed.
- Using an oven or toaster-style air fryer? Make sure to rotate the tray so that the garlic bread is cooked evenly.
- Cooking times will vary depending on the air fryer used. Adjust time as needed.
Variations and substitutions
- Season it with Italian seasoning or chili flakes.
- Make it more cheesy, or skip the cheese altogether.
- Substitute 7-8 garlic cloves with a teaspoon of garlic powder.
- Vegan version: Use olive oil instead of butter, and instead of parmesan, use vegan cheese.

How to prep ahead
Planning a party or want to freeze some for later? Here’s how to prep ahead:
- Cook and freeze – Make sure it is completely cooled down before sealing it in an air-tight container or Ziploc.
- Prep and freeze – Spread the garlic butter over the bread and freeze it in a single layer on a baking tray. Once frozen, store it in an airtight container or Ziploc.
Storage tips
Refrigerator – You can store leftover garlic bread in the refrigerator for up to 3 days. If you prefer a longer storage time, you can freeze leftovers in a Ziploc for up to 3 months.
Reheat instructions – Reheat leftovers in the air fryer at 350°F. Reheat the refrigerated ones for 2-3 minutes and the frozen homemade garlic bread for 4-5 minutes.
SERVE IT WITH
This crispy air fryer garlic toast makes for a perfect side dish that goes with almost anything. Here are a few suggestions:
- Lasagna – you’ll love my Instant Pot lasagna recipe.
- Pasta – any pasta dish will work, but I enjoy this vegetarian pasta made in the Instant Pot.
- Soup – air fryer garlic bread is perfect for dunking into a hearty bowl of soup like my tomato basil soup recipe.
- Also, goes well with salads, stews, and pizza.


Frequently Asked Questions
Garlic bread can be made with various bread options, but baguettes and ciabatta loaves are the most popular. These both result in a chewy, slightly crisp garlic bread that is full of flavor. Other options include thickly sliced bread (for Texas toast), sourdough bread, or brioche.
Garlic bread uses artisan bread like ciabatta, baguettes, and brioche, while Texas toast uses a standard loaf of thickly sliced sandwich bread.
Reheat it at 350°F for 2-3 minutes or until warmed through.
Avoid overcooking by keeping a close eye on it and removing it as soon as it is warmed. To keep the bread from drying out, you can wrap it loosely in foil before reheating to help retain any moisture.
If you are cooking a full split loaf of frozen garlic bread, you can expect it to take between 6-8 minutes, depending on the model of your air fryer. If you are cooking individual slices, it may take as little as 3 minutes. Watch your food closely and remove it when lightly browned and warmed through for the best results.
To cook your store-bought frozen garlic bread, preheat your air fryer to 350°F and cook for 10-12 minutes, flipping halfway through cooking if your bread does not have cheese. Remove when the garlic bread is bubbly, hot, and lightly toasted.
Yes, you can microwave garlic bread. Place your garlic bread on a plate or a paper towel and heat in 30-second intervals, checking how warm each slice is after each interval. Cook for 1.5 – 2 minutes, depending on the quantity of garlic bread you’re using.
The easiest way to make garlic bread soft again is to microwave it since the stream stays trapped in the microwave and will soften the garlic bread.
If you want to make garlic bread with sliced bread, spread garlic butter on one side of each slice. Sprinkle with cheese, if desired, and bake or air fry at 350°F until lightly toasted and bubbly.
The easiest way to keep garlic bread warm is to preheat your oven to 200°F. Once the temperature is reached, turn off the oven. Place your garlic bread in a heatproof dish and cover it loosely with a kitchen towel. Place the dish into the oven, and allow it to rest there until you’re ready to eat, or for up to 45 minutes.
Other air fryer recipes to try

The Best Homemade Air Fryer Garlic Bread Recipe
Equipment
Ingredients
- 1 baguette French or Italian
- 1 stick unsalted butter at room temperature
- 2 tablespoons minced garlic ~7-8 cloves
- ½ cup parmesan cheese ~4 tablespoons
- 2 teaspoons dried parsley
- ¼ teaspoon salt
- ¾ cup shredded mozzarella
- ground black pepper optional
Instructions
- Slice the baguette into 1-inch slices.

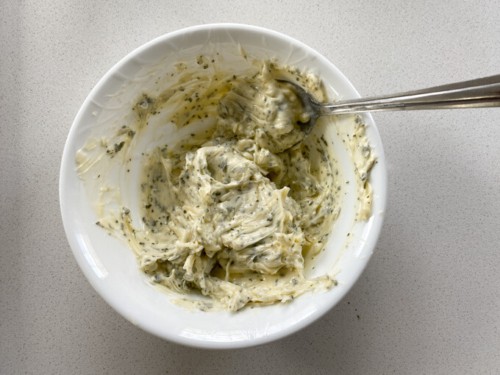
- To a medium-sized bowl, add softened butter, minced garlic, parmesan cheese, parsley, and salt. Mix well to combine.
- Use a butter knife to coat one side of the baguette slices with the garlic-butter mixture.
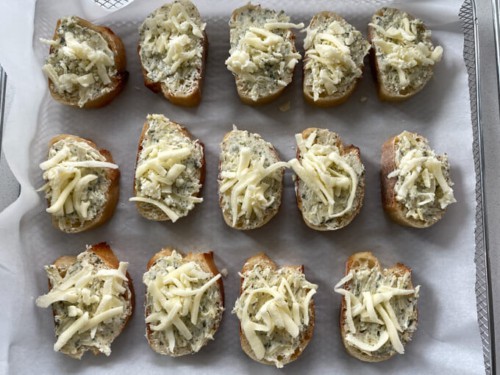
- [Optional step] Line the air frying tray with parchment paper.
- Transfer the baguette slices over the parchment paper – don't overcrowd them. Depending on the size of your airfryer, you may have to make them in batches.
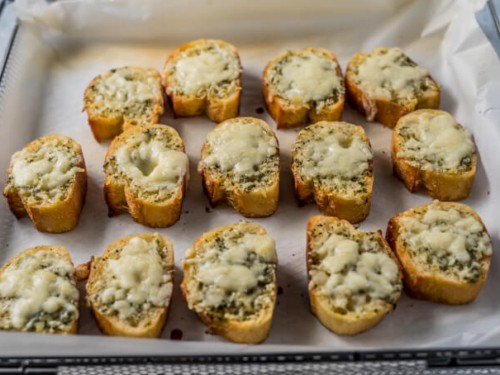
- Place the air fryer tray in the air fryer and cook at 350°F. Set the timer for 3-5 minutes.
- Cook till the edges of the bread start browning and the cheese has melted. [Note: If using an oven-style air fryer, rotate the tray to ensure even cooking]
- Serve the garlic bread immediately with freshly ground pepper (optional)

Notes
Disclaimer: Approximate nutritional information is provided as a courtesy and can vary depending on the exact ingredients/brands used. If you have health issues, please work with a registered dietician or nutritionist.