Easy Homemade Yogurt Recipe (Instant Pot + Stovetop method)
Note: This post contains affiliate links. As an Amazon Associate I earn from qualifying purchases.


Homemade yogurt recipe – If you have trouble making yogurt at home, try this fail-proof recipe to make it using Instant Pot. With clear instructions, loads of tips/tricks, and troubleshooting advice, this recipe will yield you consistent results every time.
Do you make yogurt or curd (as we call it in India) at home? I didn’t until I got the 7-in-1 Instant Pot. With everyone raving about its yogurt-making capabilities, I had to put it to the test!
And, when I did, I loved how easy it was to make yogurt in it and the fact that it gave perfect results every time.
Table of contents
How to make homemade yogurt from milk
Ingredients for homemade yogurt
- Whole milk (Skim milk is okay but the yogurt will be thinner)
- Yogurt starter or culture (I recommend Fage Greek yogurt or any yogurt with active bacterial cultures)
Your yogurt will be only as good as the yogurt starter you pick. That’s why I would recommend that you use your favorite store brand yogurt for the starter after confirming that it has active bacterial cultures.
Equipment needed
- Saucepan or Instant Pot
- Thermometer
- Heatproof / Ovenproof Glass containers (Pyrex or canning jars) or steel container (optional)
- Strainer (to make Greek yogurt)
- Refrigerator 🙂
4-step Yogurt making process
- Boil milk to 180°F.
- Cool it down to 115°F.
- Add culture/yogurt starter and mix it well. Note: You need 2 tablespoons of yogurt as a starter/culture for every 1/2 gallon (8 cups) of milk.
- Incubate the milk between 100°F to 110°F for 6-10 hours or until the desired thickness/tartness is achieved.
Why use Instant Pot to make yogurt?
Most Instant Pots (except LUX) have a yogurt setting which provides a controlled temperature setting that is perfect for making yogurt. That means you get consistent results every time.
Yogurt temperature settings in Instant Pot
- “More” for pasteurizing/boiling milk: 160~180°F (71~83°C ).
- “Normal” mode for setting yogurt: 96.8 ~ 109.4°F (36 ~ 43° C )
Instructions to make homemade yogurt using Instant Pot and Stovetop
How to make yogurt in Instant Pot
Before you start, clean the inner pot, sealing ring, and lid thoroughly to make sure there is no food residue. Check out this article on how to deep clean your Instant Pot.
Yogurt can be made in the Instant Pot in 2 ways – using the steel inner pot that comes with the Instant Pot or by the pot-in-pot method where heatproof glass containers (Pyrex or canning jars) or steel container is placed on the trivet.
Note: While I have tested glass containers, but there is always a possibility that they will crack. So use it at your own risk.
I prefer the pot-in-pot method because the container can go straight from the Instant Pot to the refrigerator freeing up the inner pot for cooking other things.
Boiling milk
- Remove the yogurt starter and set it on the countertop so that it is not cold when you are adding it to the milk.
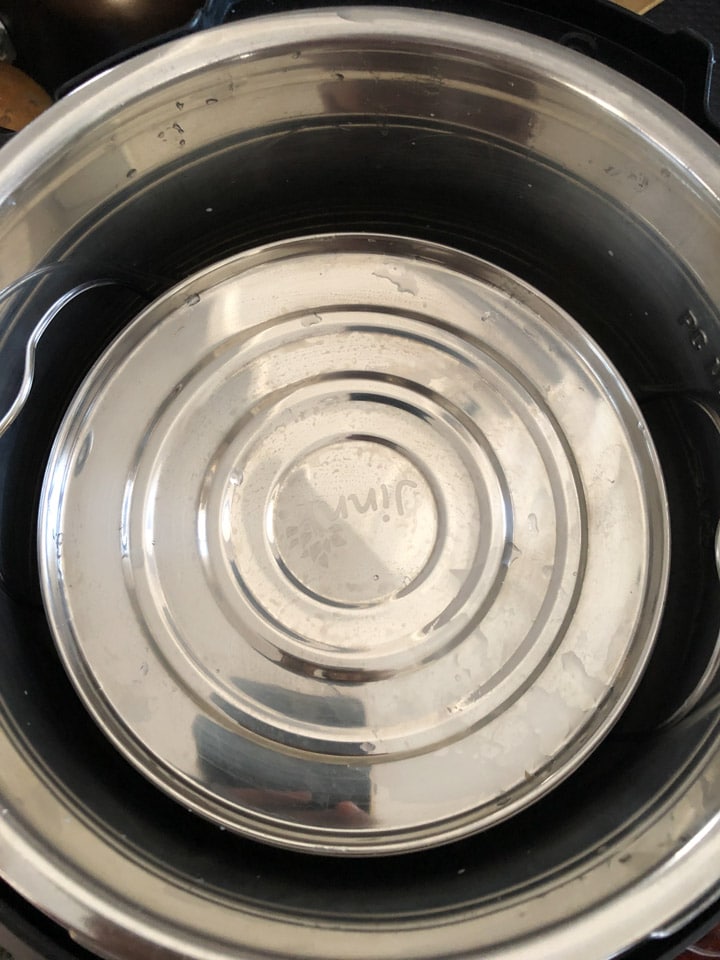
- Add a cup of water into the steel insert in the Instant Pot and put the trivet in.
- Place either a heatproof glass or a steel container on top of the trivet.
- Pour the milk inside the container and cover it with a lid.
- Close the Instant Pot lid. Select the “Steam” function and set the timer for 2 minutes. Set the vent to ‘Sealing’.
- Once the cooking cycle is complete, quickly release the steam. Open the Instant Pot lid followed by the lid of the covered container.
- Check the temperature of the milk to make sure it is 180°F.
If you prefer to make yogurt directly in the inner pot, follow the steps below.
- Add milk to the inner steel pot. Cover the lid.
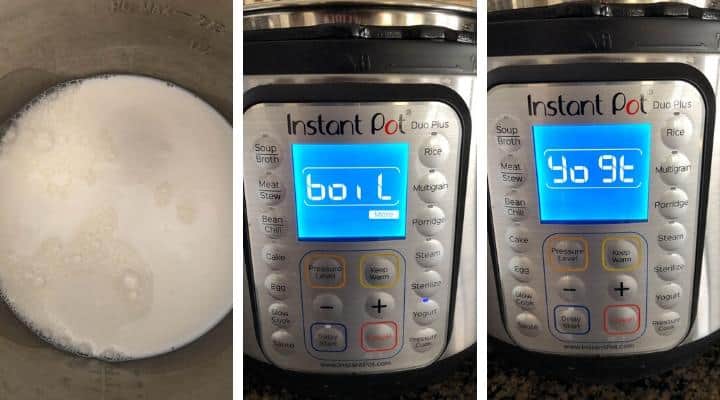
- Press “Yogurt” and then press “Adjust” to the “More” mode and you should see the word “boil” on the display. The milk will start to boil. When it’s done, Instant Pot will beep and display “yogt”. Press the warm/cancel key to turn off the Instant Pot. Alternatively, you can steam the milk for 2 minutes. Release the pressure carefully once the cooking cycle is complete.
- Check the temperature of the milk to make sure it is 180°F.
Cooling milk
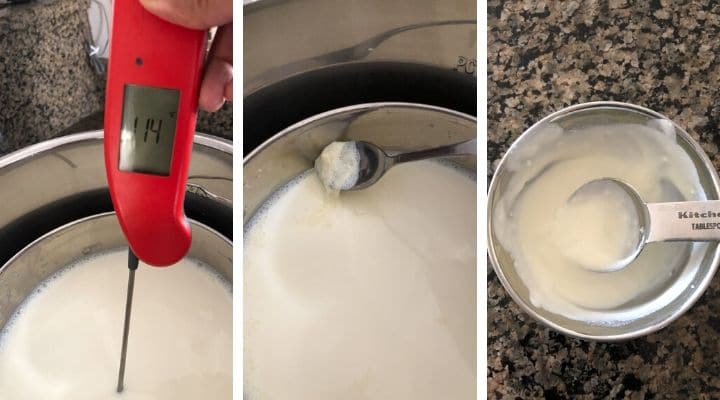
- Let the milk cool to below 115°F or 46°C. You can use a thermometer or a clean finger to get a feel for the temperature. When using your finger, the milk should be lukewarm to touch and not scorching hot.
- Optional step – Discard the thin film of milk (or malai) floating on the top.
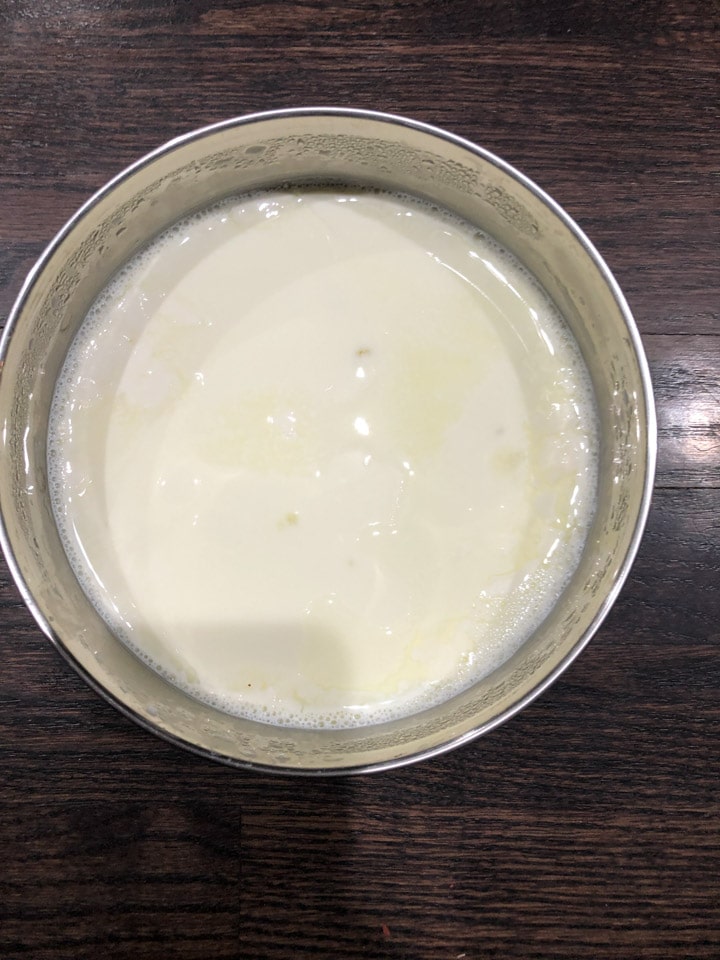
- Take about 1/4 cup of milk and add yogurt to it. Mix till it is well-combined. Add this mixture to the boiled milk and mix well.
Setting yogurt
- Turn the Instant Pot on.
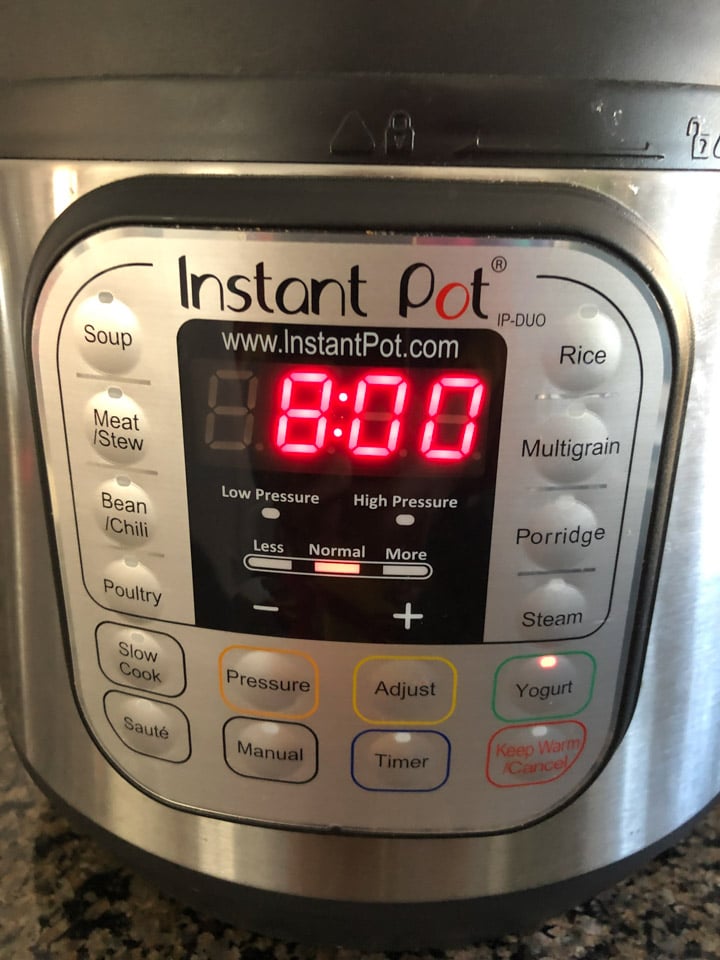
- Press the “Yogurt” function key. Adjust the time using “+” and “-“ keys to set it for 8 hours.
- Close the lid. The program will start in 10 seconds.
- When the program is complete, Instant Pot will beep and the display will show “yogt“.
- Refrigerate the yogurt for at least a couple of hours or overnight. This will help set and solidify the yogurt.

Instant Pot Yogurt Set the Yogurt mode for 8 hours Yogurt is ready
Stovetop method to make yogurt
- Clean the saucepan thoroughly to make sure there is no food residue.
- Remove the yogurt starter and set it on the countertop so that it is not cold when you are adding it to the milk.
- Boil milk – In a saucepan, add whole milk and let it come to boil. Check the temperature to make sure it is close to 180°F. Turn off the gas and set the saucepan aside.
- Cool milk – Let the milk cool to below 115°F or 46°C. You can use a thermometer or a clean finger to get a feel for the temperature. When using your finger, the milk should be lukewarm to touch and not scorching hot.
- Optional step – Discard the thin film of milk (or malai) floating on the top.
- Add starter – Take about 1/4 cup of milk and add yogurt to it. Mix till it is well-combined. Add this mixture to the boiled milk and mix well.
- Set yogurt – Cover the saucepan and keep it in a warm place to set. In winter months, keep it in the oven with the light on. The yogurt should be ready in about 8 hours. You can also, boil the milk over the stovetop and set it using an Instant Pot.
- Refrigerate the yogurt for at least a couple of hours or overnight. This will help set and solidify the yogurt.
Traditional vs Instant Pot method for making yogurt
If you are wondering which method is better – Instant Pot or Stovetop+Oven, I would say it is a matter of personal preference. For both methods, the setting time is the same and there is no difference in taste or texture of the yogurt to make us choose one over the other.
I prefer making yogurt using the Instant Pot because I know when it gets really cold here in Chicago, it will still yield consistent results every time.
Tips for making the best tasting yogurt
- Start with a clean vessel – Clean your Instant Pot inner pot or saucepan to get rid of any residue.
- Use whole milk if you want thick and creamy yogurt.
- Boil milk for thick yogurt – Boiling milk leads to thicker yogurt and also to kill off any wild bacteria that were introduced during the packaging process.
- Use fresh ingredients – For best results, avoid stale milk and get a new starter (storebought) if you see the quality of yogurt deteriorating (most likely in a couple of months).
- Make sure the yogurt starter is at room temperature.
- Don’t forget to save the culture – Don’t forget to save at least 1/4 cup yogurt for the next batch. Do this once the yogurt has been chilled in the refrigerator. You can save the culture in the freezer as well. Bring it to room temperature before using it as a yogurt starter.
- Find the right incubation time – Don’t be afraid to experiment with the incubation time from anywhere between 6-10 hours. This will allow you to perfect the yogurt to your liking.
- Don’t keep checking on your yogurt – Refrain from checking on the yogurt. Let it sit undisturbed for at least 4 hours.
- Refrigerate for at least a couple of hours to allow the yogurt to set.
Frequently asked questions about homemade yogurt
How do I know when the yogurt is ready?
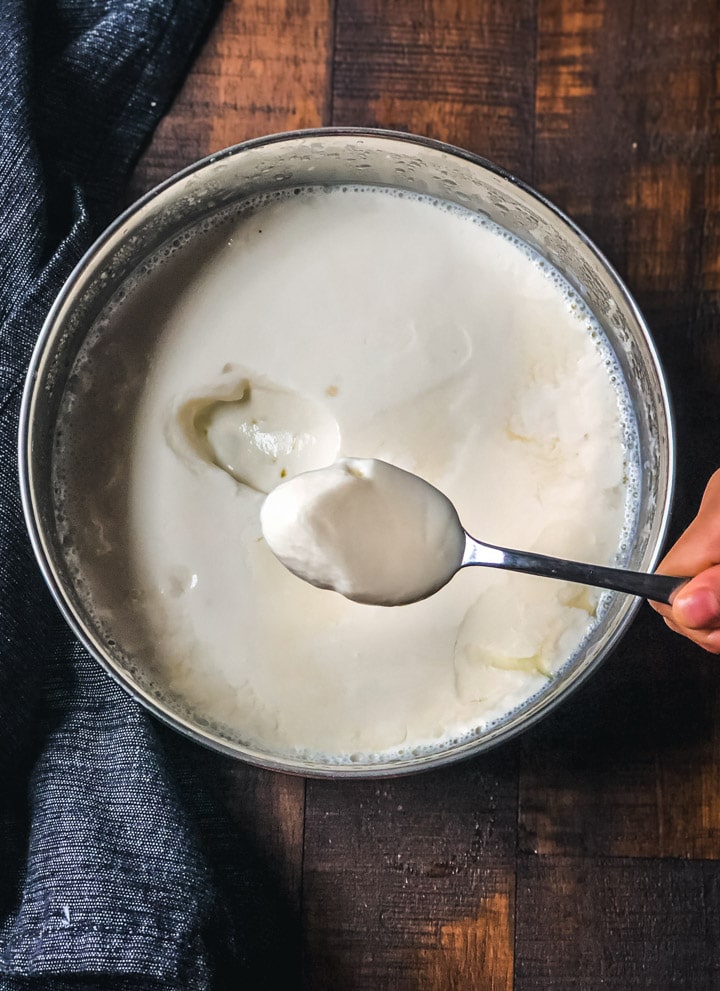
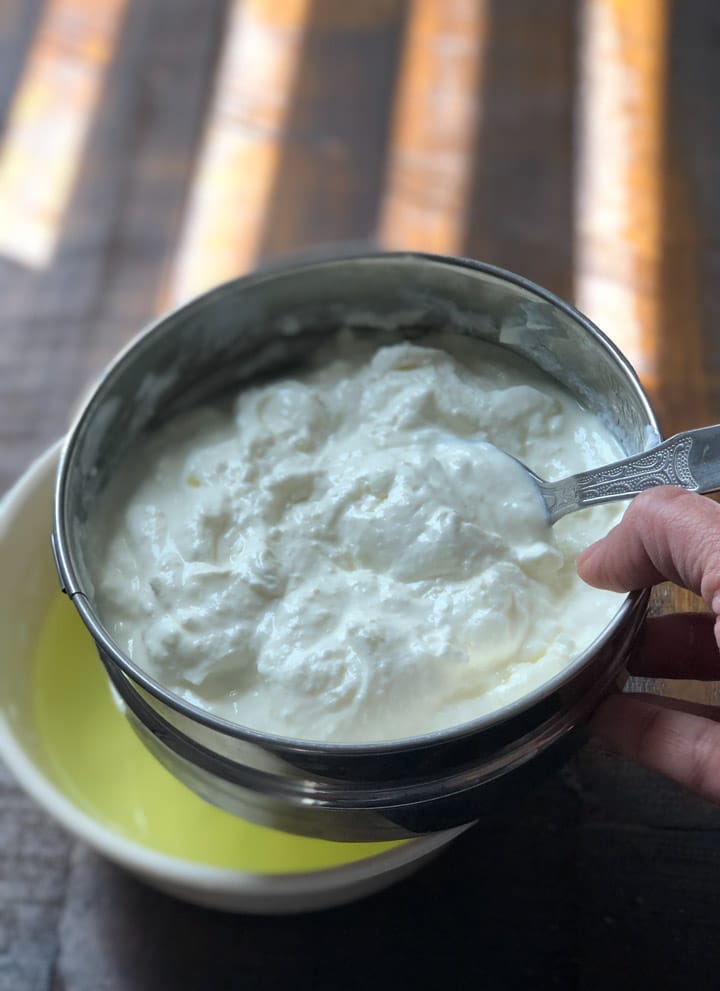
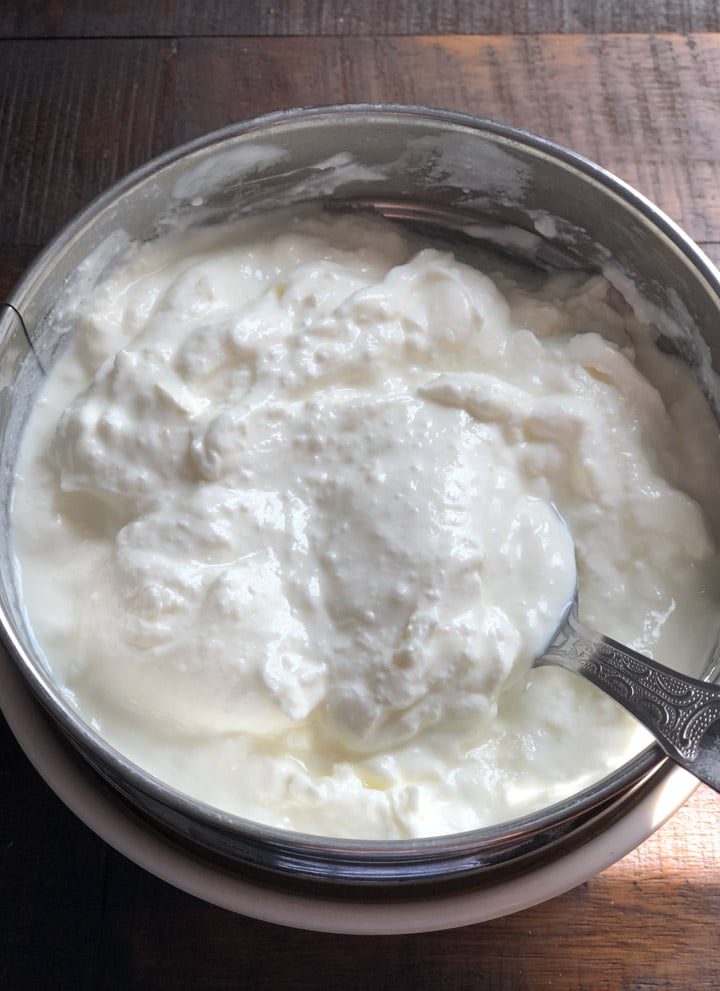
Yogurt should ideally be set in 6-8 hours. A set yogurt is jiggly and pulls away from the sides of the bowl when you tilt it.
How long does it take to make yogurt in the Instant Pot
About 9 hours which includes 20 minutes to boil milk, 30 minutes for the milk to cool down, and 6-8 hours for the yogurt to set in the Instant Pot.
How long does homemade yogurt last in the refrigerator?
For best results, make in small batches and consume within a week. Yogurt starts to lose water making it thinner and the longer you keep in the refrigerator, the sourer it becomes.
How to make Greek yogurt using Instant Pot
After the yogurt is ready and has been chilled for 4-6 hours, perform the following steps to make Greek yogurt
- Use a strainer and place it over a bowl.
- Add the yogurt in the strainer and refrigerate the bowl + strainer in the refrigerator for about 3-4 hours.
- The whey will drip in the bowl and you’ll be left with thick yogurt in the strainer.
- Whisk the yogurt till it is smooth. Store it in the refrigerator for later use.
- Discard or repurpose the whey in roti dough or in smoothies.
Troubleshooting yogurt issues
Why is my yogurt runny?
- Reason – Not enough starter.
- Solution – First of all, don’t discard your runny yogurt – use it for smoothies or use in pancakes as a substitute for buttermilk. For next time, stick to this ratio: 1 tablespoon starter/culture for every 4 cups of yogurt.
Why is my homemade yogurt slimy?
- Reason – Milk not boiled to the right temperature or the yogurt starter is causing it.
- Solution – Make sure to heat your milk to 180°F (use a thermometer to confirm). Use a new starter to set yogurt next time.
Can I eat curdled yogurt?
Yes, you can but let’s look at the possible reasons and solutions so that it doesn’t happen again
- Possible reasons – Starter was added when the milk was too hot and/or because of using more culture than needed. It could also be because the culture is old.
- Solutions – Follow the prescribed temperature/culture suggestions in the recipe below. If that doesn’t work, buy a tub of yogurt with live cultures and start over.
What to do if your yogurt did not set or you forgot to add the starter?
- Possible reasons – could be any one of these reasons – not enough culture, the incubation temperature was not ideal, the culture was old.
- Solutions – If the yogurt is not set after 8 hours, give it another 3-4 hours to set. If that doesn’t work do the following steps –
- Heat the milk up to 100 degrees F (highly recommend using a thermometer)
- Add yogurt starter.
- Allow it to set for 8-10 hours.
Discard your yogurt if it is moldy and the smell is awful – always trust your intuition with food.
Why is my yogurt is too sour or not sour?
Too sour – Reduce your incubation time next time. If it is not sour, let it incubate for a couple more hours.
Why is my yogurt grainy?
- Reason – The thin film of milk that forms after heating was not discarded.
- Solution – Discard the thin film of milk (or malai) floating on the top before you add the yogurt starter.
Now that you have a big batch of yogurt, here are some of the recipes that you can make with yogurt –
- Gujarati kadhi is a delicious yogurt-based curry that will bowl you over with its sweet and sour taste. Use an Instant Pot to make it a one-pot meal.
- Shrikhand – this addictive sweet dish made from yogurt takes all of 5 minutes and can be served as a dessert or as a delicious accompaniment to pooris.
- Kaale channe ki kadhi – Black chickpeas in a yogurt gravy is a Rajasthani dish that comprises of black chickpeas cooked in spicy yogurt and chickpea flour (besan) gravy. Famously called Jaisalmer Ke Channe, this dish serves as a perfect accompaniment for both rice and rotis.
If you are looking for more recipes, click here to find a list of ten raita recipes – some classics, a few new, and some with a twist.
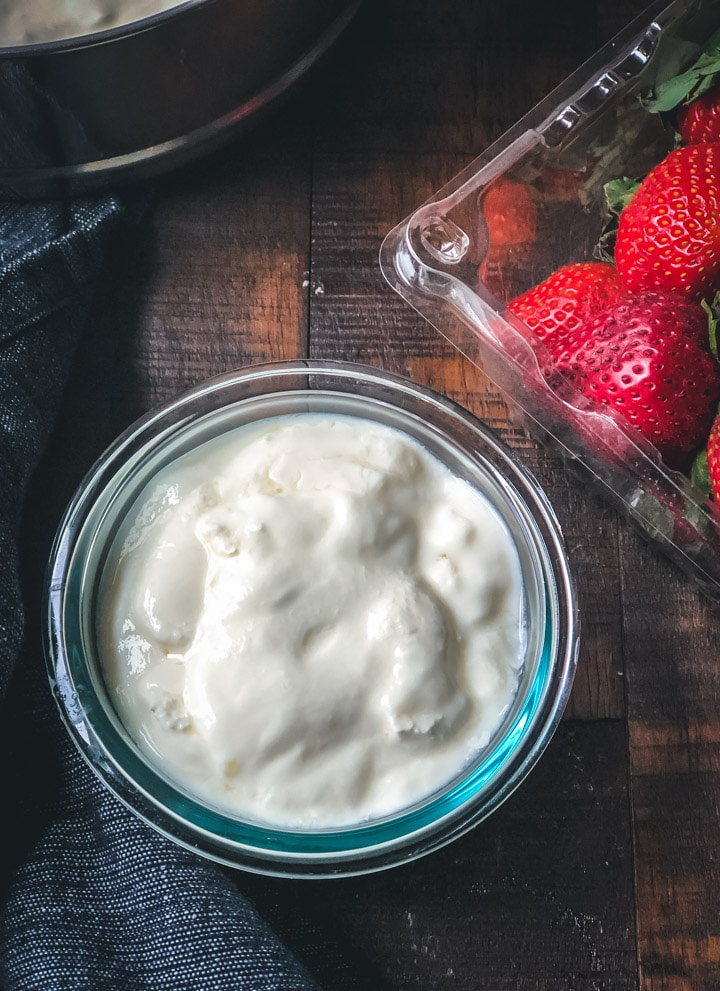
Or just enjoy this yogurt with some fruits and honey to sweeten the deal.


Instant Pot Yogurt
Equipment
Ingredients
- 4 cups whole milk
- 1 tablespoon yogurt
Instructions
Prep work
- Clean the inner pot, sealing ring, and lid thoroughly with soap and water to make sure there is no food residue and/or odors.
- Remove the yogurt starter and set it on the countertop so that it is not cold when you are adding it to the milk.
Boiling milk
- Add a cup of water into the steel insert in the Instant Pot and put the trivet in.
- Place either a heatproof glass container [read note 1] or steel container on top of the trivet.
- Pour the milk inside the container and cover it with a lid.
- Close the Instant Pot lid. Select the “Steam” function and set the timer for 2 minutes. Set the vent to ‘Sealing’.
- Once the cooking cycle is complete, quickly release the steam. Open the Instant Pot lid followed by the lid of the covered container.
- Check the temperature of the milk to make sure it is 180°F.
Cooling milk to the right temperature
- Let the milk cool to below 115°F or 46°C. You can use a thermometer or a clean finger to get a feel for the temperature. When using your finger, the milk should be lukewarm to touch and not scorching hot. [See note for approximate times]
- Optional step – Discard the thin film of milk (or malai) floating on the top to keep your yogurt from being grainy.
- Take about 1/4 cup of milk and add yogurt to it. Mix till it is well-combined. Add this mixture to the boiled milk and mix well.
Setting yogurt in Instant Pot
- Turn the Instant Pot on. No need to add additional water.
- Press the “Yogurt” function key. Adjust the time using “+” and “-“ keys to get it to 8 hours.
- Close the lid. The program will start in 10 seconds.
- When the program is complete, Instant Pot will beep and the display will show “yogt“.
- Check on your yogurt – If it is set, it will be jiggly and pull away from the sides of the container when you tilt it. If not, set it for a few more hours. If that doesn't work either, check out the troubleshooting section of the post.
- Remove the container from the Instant Pot and refrigerate for a couple of hours to set it.
Notes
- While I have tested glass containers, but there is always a possibility that it will crack. So use it at your own risk.
- In Chicago, where I live it takes about 15-20 minutes for the milk to cool down in winter and about 35-45 minutes during summer.
- Start with a clean vessel – Clean your Instant Pot inner pot or saucepan to get rid of any residue.
- Use whole milk if you want thick and creamy yogurt.
- Boil milk for thick yogurt – Boiling milk leads to thicker yogurt and also to kill off any wild bacteria that were introduced during the packaging process.
- Use fresh ingredients – For best results, avoid stale milk and get a new starter (storebought) if you see the quality of yogurt deteriorating (most likely in a couple of months).
- Make sure the yogurt starter is at room temperature.
- Don’t forget to save the culture – Don’t forget to save at least 1/4 cup yogurt for the next batch. Do this once the yogurt has been chilled in the refrigerator. You can save the culture in the freezer as well. Bring it to room temperature before using it as a yogurt starter.
- Find the right incubation time – Don’t be afraid to experiment with the incubation time from anywhere between 6-10 hours. This will allow you to perfect the yogurt to your liking.
- Don’t keep checking on your yogurt – Refrain from checking on the yogurt for at least 4 hours.
- Add milk to the inner steel pot. Cover the lid.
- Press “Yogurt” and then press “Adjust” to the “More” mode and you should see the word “boil” on the display. The milk will start to boil. When it’s done, Instant Pot will beep and display “yogt”. Press the warm/cancel key to turn off the Instant Pot. Alternatively, you can steam the milk for 2 minutes. Release the pressure carefully once the cooking cycle is complete.
- Check the temperature of the milk to make sure it is 180°F.
- Clean the saucepan thoroughly to make sure there is no food residue.
- Remove the yogurt starter and set it on the countertop so that it is not cold when you are adding it to the milk.
- Boil milk – In a saucepan, add whole milk and let it come to boil. Check the temperature to make sure it is close to 180°F. Turn off the gas and set the saucepan aside.
- Cool milk – Let the milk cool to below 115°F or 46°C. You can use a thermometer or a clean finger to get a feel for the temperature. When using your finger, the milk should be lukewarm to touch and not scorching hot.
- Optional step – Discard the thin film of milk (or malai) floating on the top.
- Add starter – Take about 1/4 cup of milk and add yogurt to it. Mix till it is well-combined. Add this mixture to the boiled milk and mix well.
- Set yogurt – Cover the saucepan and keep it in a warm place to set. In winter months, keep it in the oven with the light on. The yogurt should be ready in about 8 hours. You can also, boil the milk over the stovetop and set it using an Instant Pot.
- Use a strainer and place it over a bowl.
- Add the yogurt in the strainer and refrigerate the bowl + strainer in the refrigerator for about 3-4 hours.
- The whey will drip in the bowl and you’ll be left with thick yogurt in the strainer.
- Whisk the yogurt till it is smooth. Store it in the refrigerator for later use.
- Discard or repurpose the whey in roti dough or in smoothies.
Disclaimer: Approximate nutritional information is provided as a courtesy and can vary depending on the exact ingredients/brands used. If you have health issues, please work with a registered dietician or nutritionist.
Nutrition
This recipe was originally published on Dec 4th, 2016, and has been completely updated with pictures and troubleshooting instructions on November 15th, 2019.