• Skip to primary navigation
  • Skip to main content
  • Skip to primary sidebar
Simmer to Slimmer logo
  • Instant Pot
  • Recipes
    • Breakfast
      • Dosas, Idlis and Appas
      • Eggs
      • Sweets and Savouries
      • Pancakes and Waffles
      • Breads and Muffins
    • Main Course
      • Curries, Lentils and Dals
      • Indian Bread (Rotis/Parathas)
      • Rice Dishes
      • Side Dishes
    • Appetizers and Snacks
    • Accompaniments
      • Beverages
      • Chutneys
      • Jams and Spreads
      • Raita
      • Soups
    • Desserts
      • Indian Sweets
      • Bars
      • Cakes
      • Cookies
      • Ice Cream
  • Getting Started
    • Kitchen Setup
    • Indian Food
    • Instant Pot
    • Food Blog
    • Gift Guides
  • About
  • Nav Social Menu

    • Facebook
    • Instagram
    • Pinterest
    • Twitter
menu icon
go to homepage
search icon
Homepage link
  • Recipes
  • Indian Food 101
  • Instant Pot 101
  • Starting a Food Blog
  • Gift Guides
  • About Me
  • Contact
    • Facebook
    • Instagram
    • Pinterest
    • Twitter
  • ×

    Home » Indian Food Recipes » Instant Pot » Beginners guide » Homemade ghee in Instant Pot using butter

    Homemade ghee in Instant Pot using butter

    Published on January 10, 2018 | By Anushree Shetty

    Share
    Pin
    Tweet
    Yum
    Email
    Servings: 64 tablespoons
    Burnt your ghee? Never again! Follow this detailed fail-proof recipe with step by step pictures to make ghee in an Instant Pot. Save money and say goodbye to storebought ghee.
    Cook Time: 20 mins
    Total Time: 20 mins
    4.75 from 4 votes
    Jump to Recipe Jump to Video
    The collage has two images - The first one depicts Ghee made in Instant Pot and in the second image it is being filtered and poured in a glass jar.
    Two images in a collage. The first image features ghee in a glass jar next to an Instant Pot. The second image is of the ghee when it has cooled down.
    Ghee in a glass bottle.Instant Pot steel insert is in the background

    Burnt your ghee? Never again! Follow this detailed fail-proof recipe with step by step pictures to make ghee in Instant Pot and say goodbye to storebought ghee.

    Freshly made ghee strained in a glass jar.
    Ghee made using an Instant Pot

    Making ghee in Instant Pot is so easy – just pop the butter in the Instant Pot and voila – you’ll have homemade ghee in no time. Before you learn how to make ghee in Instant Pot, read the most asked questions about ghee.

    Ghee versus clarified butter – How are they different?

    Both ghee and clarified butter are made by bringing unsalted butter to a boil. If you want to make clarified butter, here’s the process –

    1. Bring unsalted butter to a boil. In a few minutes, it will turn frothy.
    2. Once the froth settles down, the milk solids will separate and sink to the bottom and you’ll see a clear liquid on top. Take it off the heat immediately and what you have now is clarified butter.

    To make ghee, lower the heat and continue to cook until the milk solids turn brown. This gives ghee the distinct nutty flavor and aroma.

    Ghee is predominantly used in South Asian cooking curries, dal, rice dishes (biryanis) etc whereas clarified butter is best for pan-frying.

    Is ghee good for you?

    Ghee has a unique short-chain fatty structure which helps mobilize fats from stubborn fat areas in your body. In short, it helps you lose weight according to Rujuta Diwekar – India’s top fitness expert. Click here to read more about the goodness of ghee.

    How is ghee better than butter?

    1. Ghee does not contain lactose or casein like butter does thus making it suitable for folks who are lactose or casein-sensitive.
    2. Other than supporting weight loss, ghee also helps build strong bones and is rich in fat-soluble vitamins.
    3. Ghee also has a high smoke point which ensures that ghee won’t burn as quickly as butter.
    4. Lastly, ghee contains a higher amount of medium and short-chain fatty acids compared to butter and thus putting it in the category of heart-healthy fat that is good for you.

    Which butter is best to make ghee?

    I like Amish unsalted butter the best, followed by Kerry Gold and Costco organic unsalted butter.

    Do you need to refrigerate ghee?

    Ghee stores well in a kitchen cabinet for up to 3 months and in a refrigerator up to a year.

    What to do with leftover milk solids after making ghee?

    There are a couple of things you can do with the brown milk solids

    1. Add the milk solids to your soup, dals/curries or add it to your rice while it is cooking.
    2. Use it to make dough for rotis or chapatis.
    3. Saute it along with ½ a cup of wheat flour or rice flour until the flour turns light brown. Add sugar (or jaggery powder) and cardamom powder and mix well. Take off heat. Enjoy!
    4. Combine the milk solids with a cup of water and bring this mixture to a boil. Strain it and discard the milk solids. Store the liquid in the refrigerator after it cools down overnight. You’ll see a thick layer of ghee floating on the surface the next day. After you skim the ghee from the top, use the remaining water to make dough for chapatis/rotis.
    5. Use them to make laddoos 🙂

    How to make homemade ghee in Instant Pot?

    Freshly made ghee cooling down in a glass jar.
    Liquid gold aka ghee

    How to prevent ghee from burning?

    With most Instant Pot recipes, I would recommend following the cooking times to a T but not with ghee. When you are making ghee from butter at home, more than looking at the clock, you need to look for visual cues. That’s where this post is going to come handy. Follow the directions and you’ll never burn your ghee again. If you are looking for a recipe to make homemade ghee on the stovetop, click here to get the recipe.

    If you are not familiar with Instant Pot, here are a few articles that might help
    – Instant Pot pressure cooker review – Do you really need one?
    – 10 things to know before using your Instant Pot
    – All you need to know about your Instant Pot 

    Other recipes for you to try on your Instant Pot

    • Indian Chickpeas curry (Chole)
    • Dal fry
    • Kidney beans curry (Rajma)
    • How to make yogurt in Instant Pot
    • How to ferment Idli batter in Instant Pot

    Before you leave, do follow me on Pinterest and pin this recipe to your board to make it in the future.

    A glass bottle with ghee

    Homemade ghee Instant Pot using butter

    Burnt your ghee? Never again! Follow this detailed fail-proof recipe with step by step pictures to make ghee in an Instant Pot. Save money and say goodbye to storebought ghee.
    4.75 from 4 votes
    Print Pin Save Saved! Rate
    Cook Time: 20 minutes
    Total Time: 20 minutes
    Servings: 64 tablespoons
    Calories: 102kcal
    Diet : Gluten-free, Vegetarian
    Course : Basics
    Method: Instant Pot
    Cuisine : Indian

    Ingredients
      

    • 2 lbs butter
    Prevent your screen from going dark

    Equipment

    • Instant Pot
    • Strainer
    • Glass bottle to store ghee

    Instructions
     

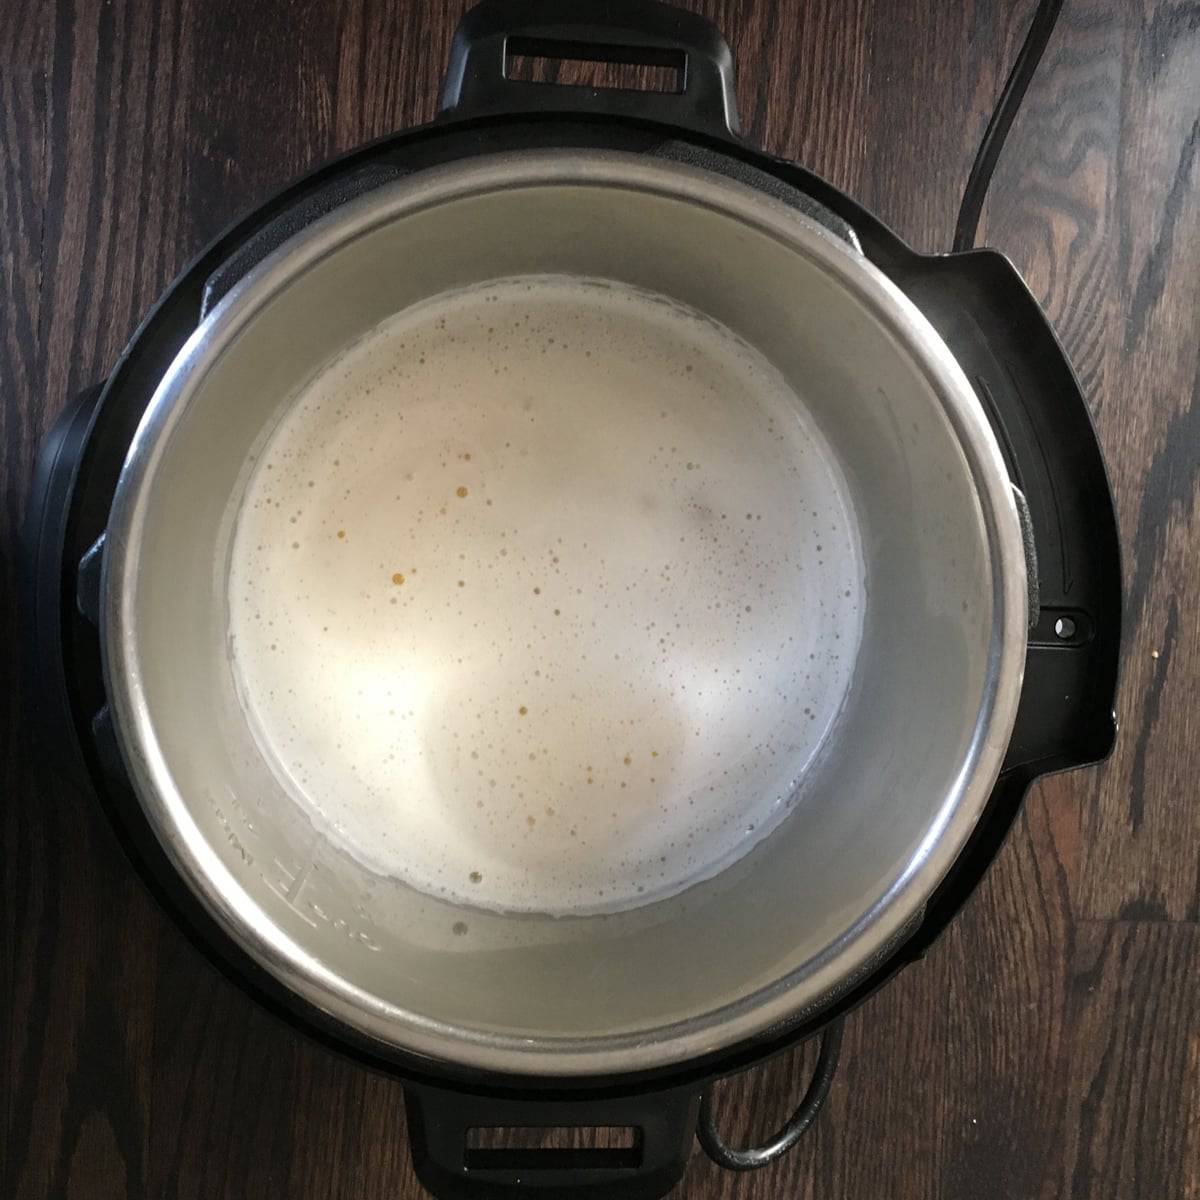
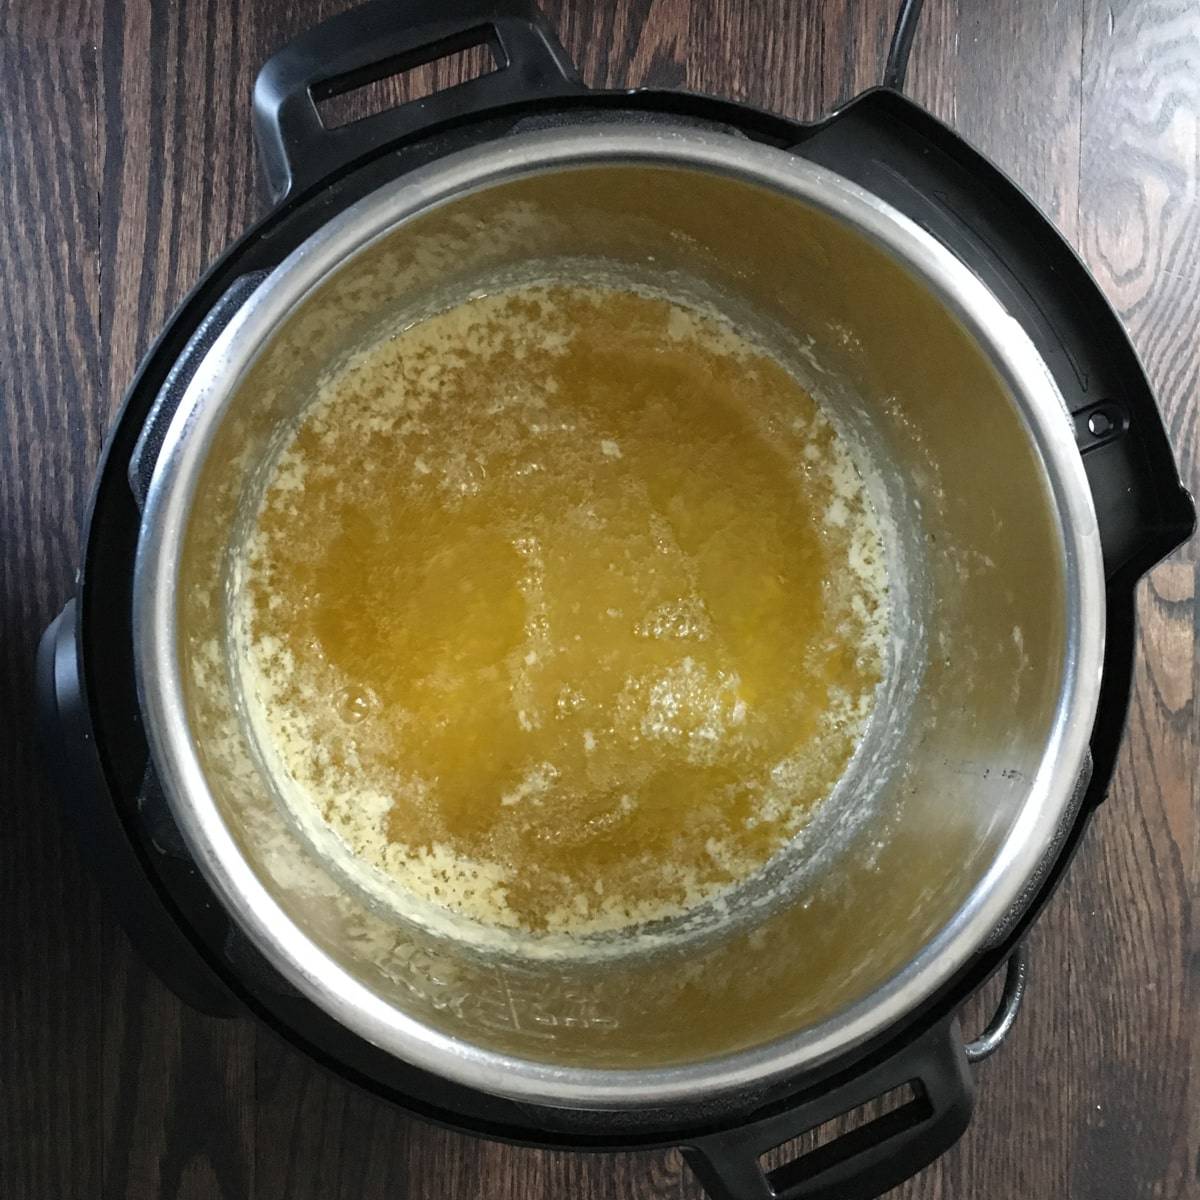
    • Place the steel insert in the Instant Pot and press the Saute function. Press the Adjust button to move the selection to “Normal” and wait till the display reads “Hot.” Add butter and let it melt. As the butter melts, it will start getting frothy.
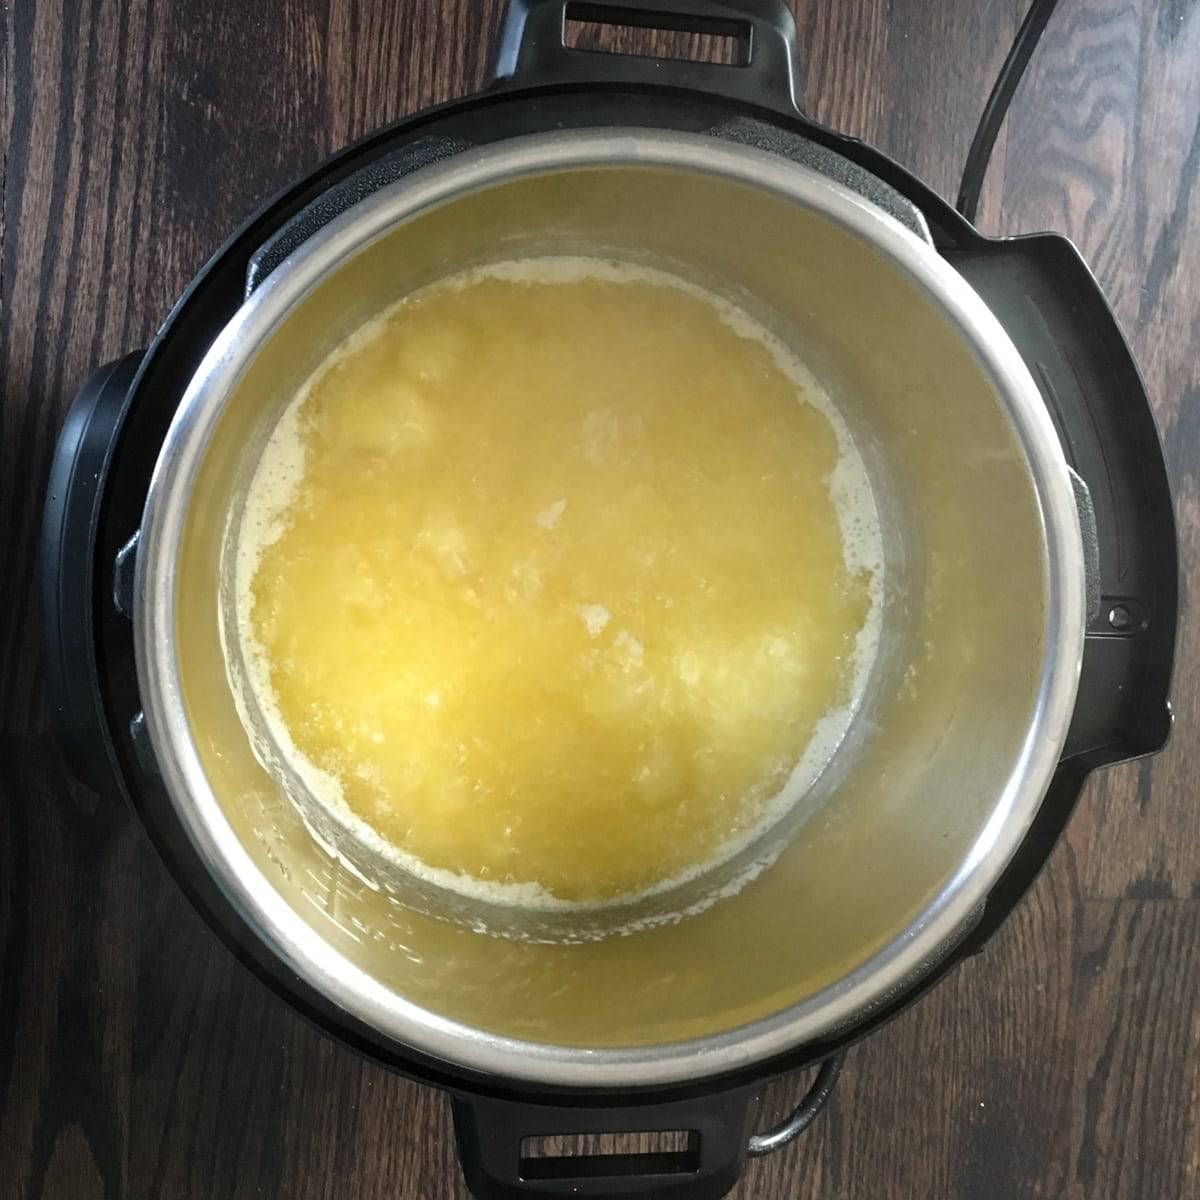
    • Give it a quick stir and continue to cook. The froth will start to disappear slowly and will look the image below.
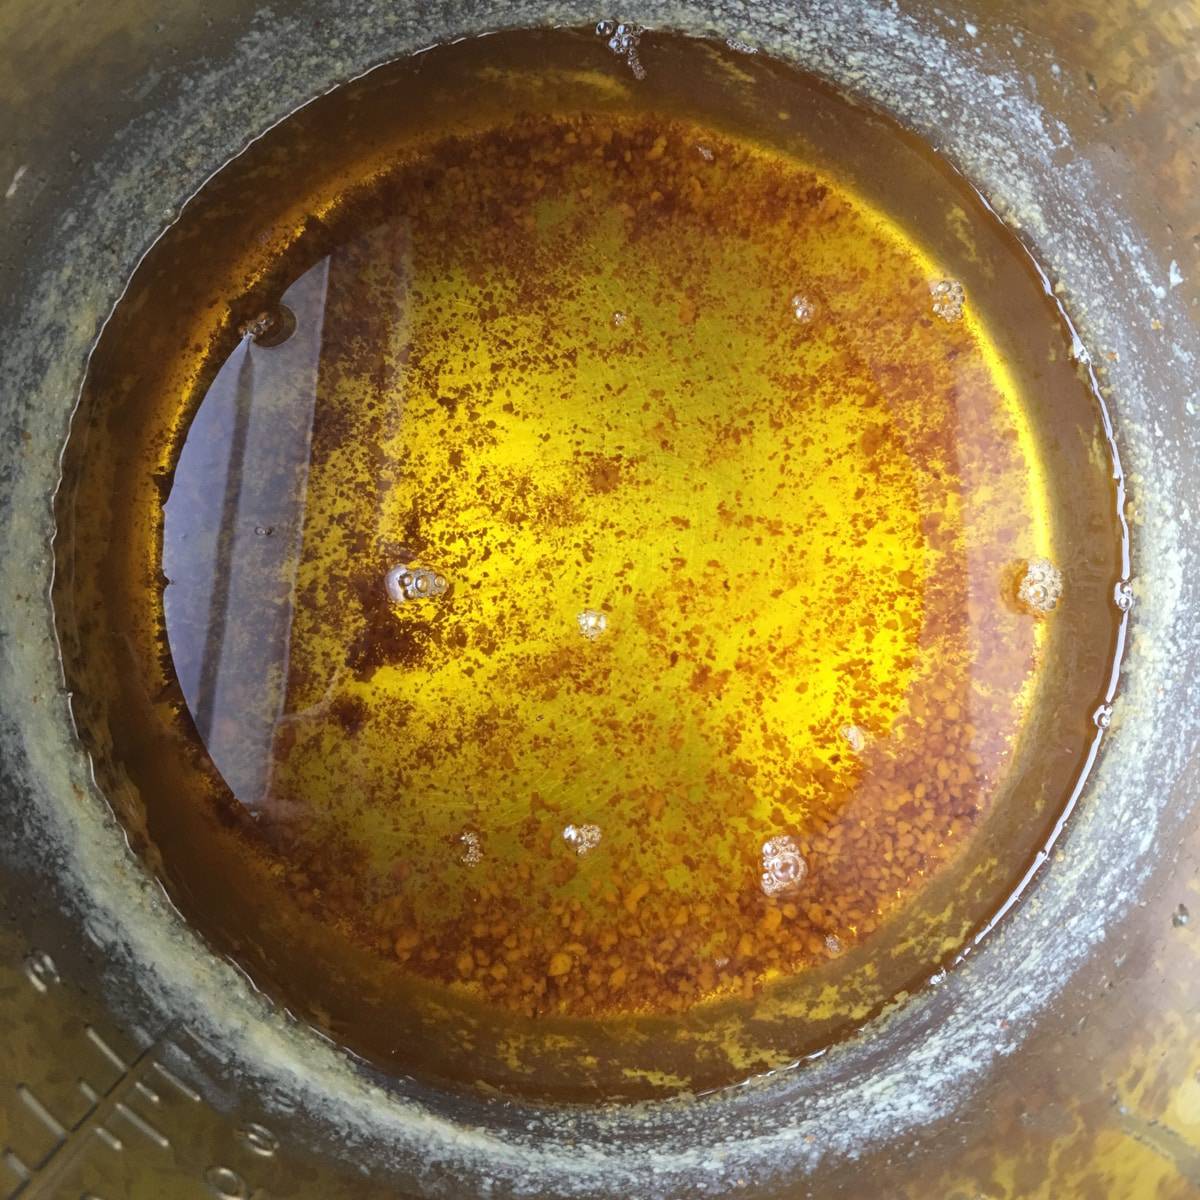
    • The milk solids will start moving towards the bottom. Click cancel once the melted butter becomes transparent and you can see the milk solids below. This is clarified butter and if that's what you want to make, remove the steel insert carefully from the Instant Pot to stop the cooking process. To make ghee, unplug the Instant Pot but leave the pot in and proceed to the next step. 
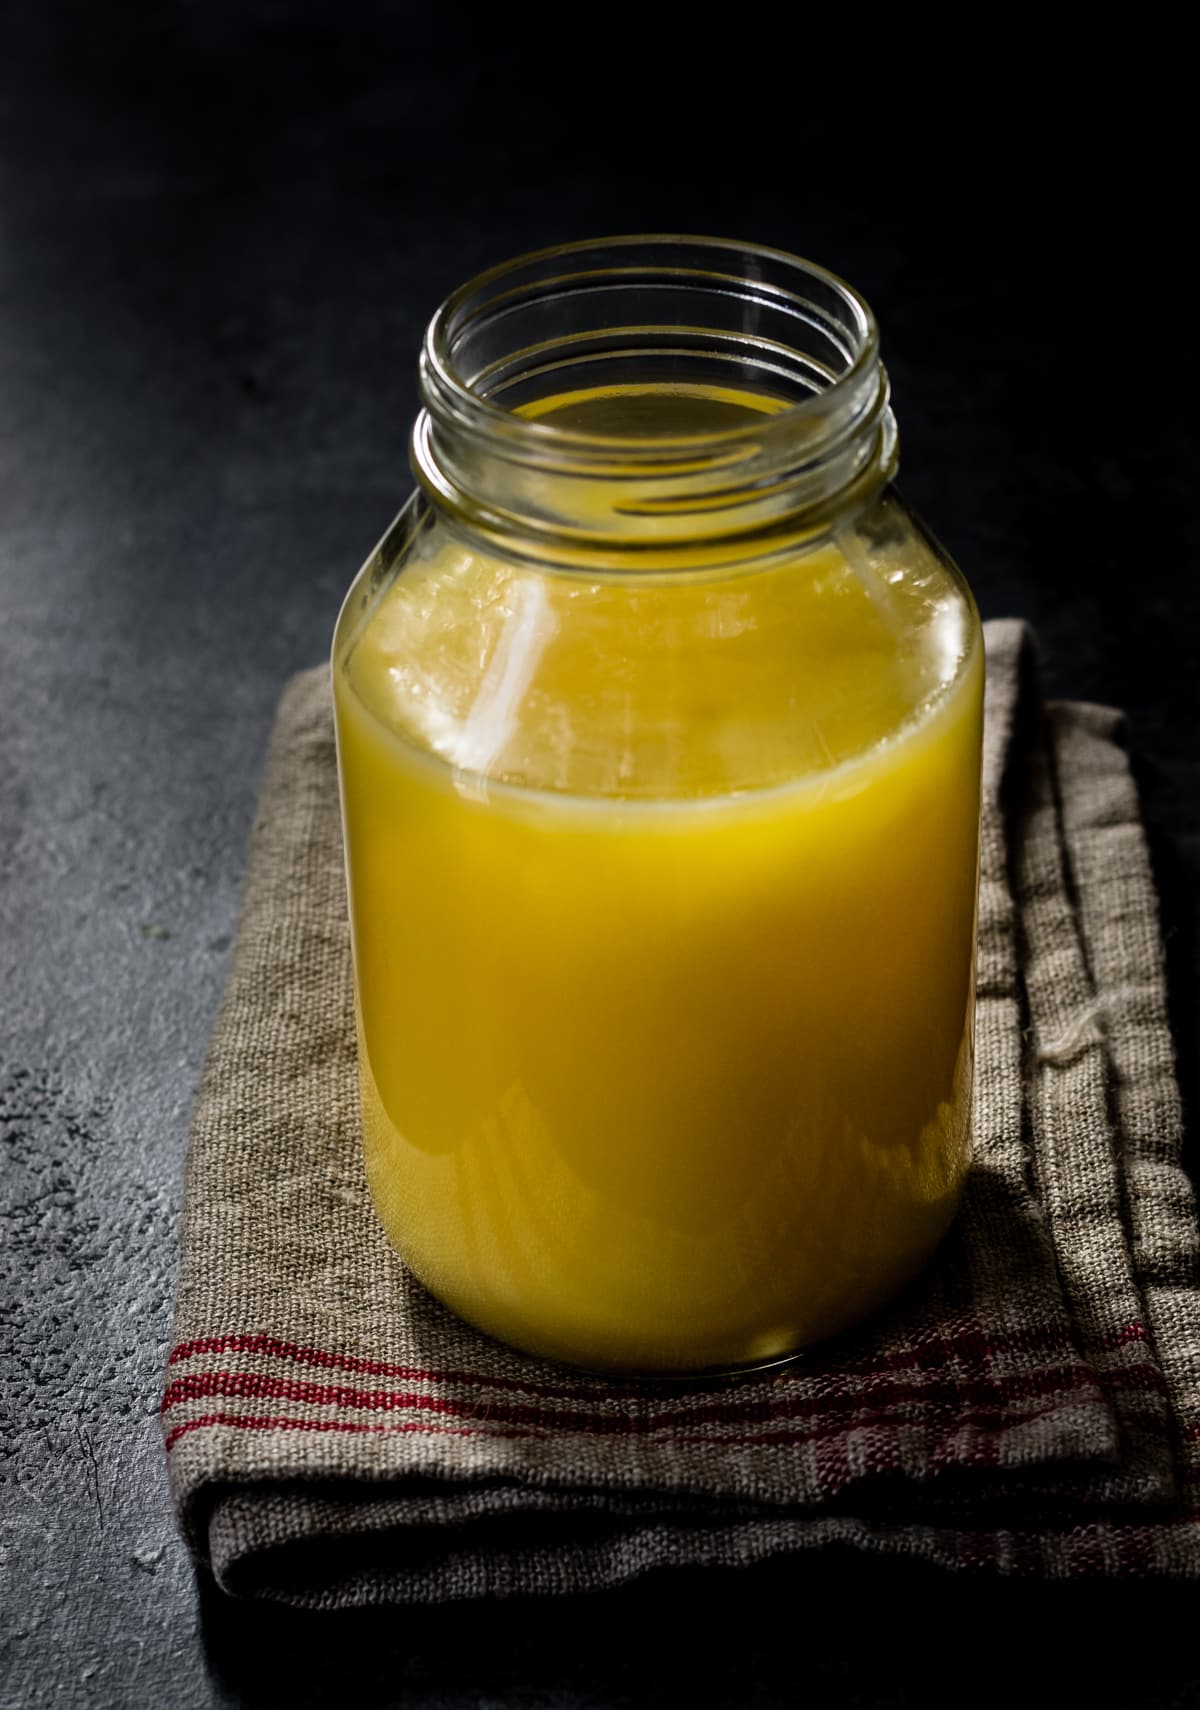
    • The ghee will continue to cook and you will see the milk solids turn brown and you will be left behind with a clear liquid.
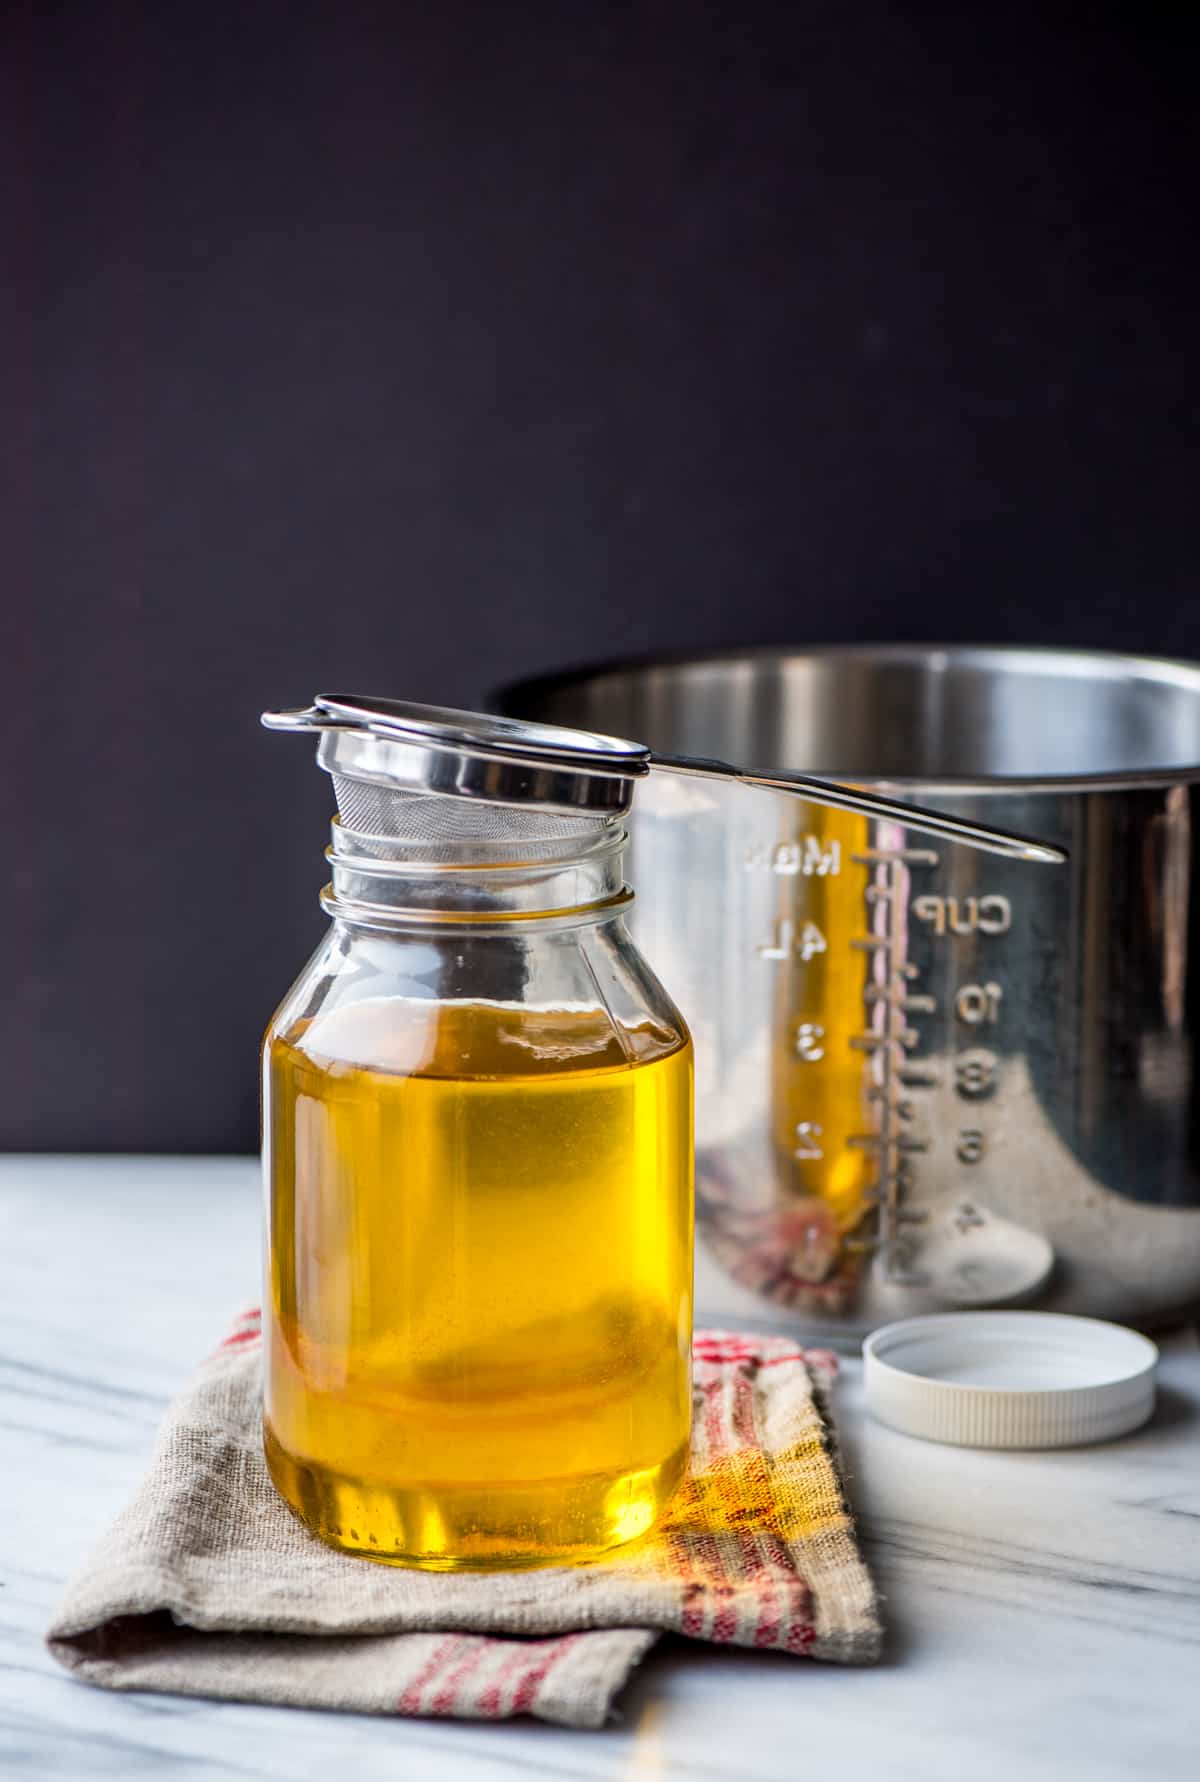
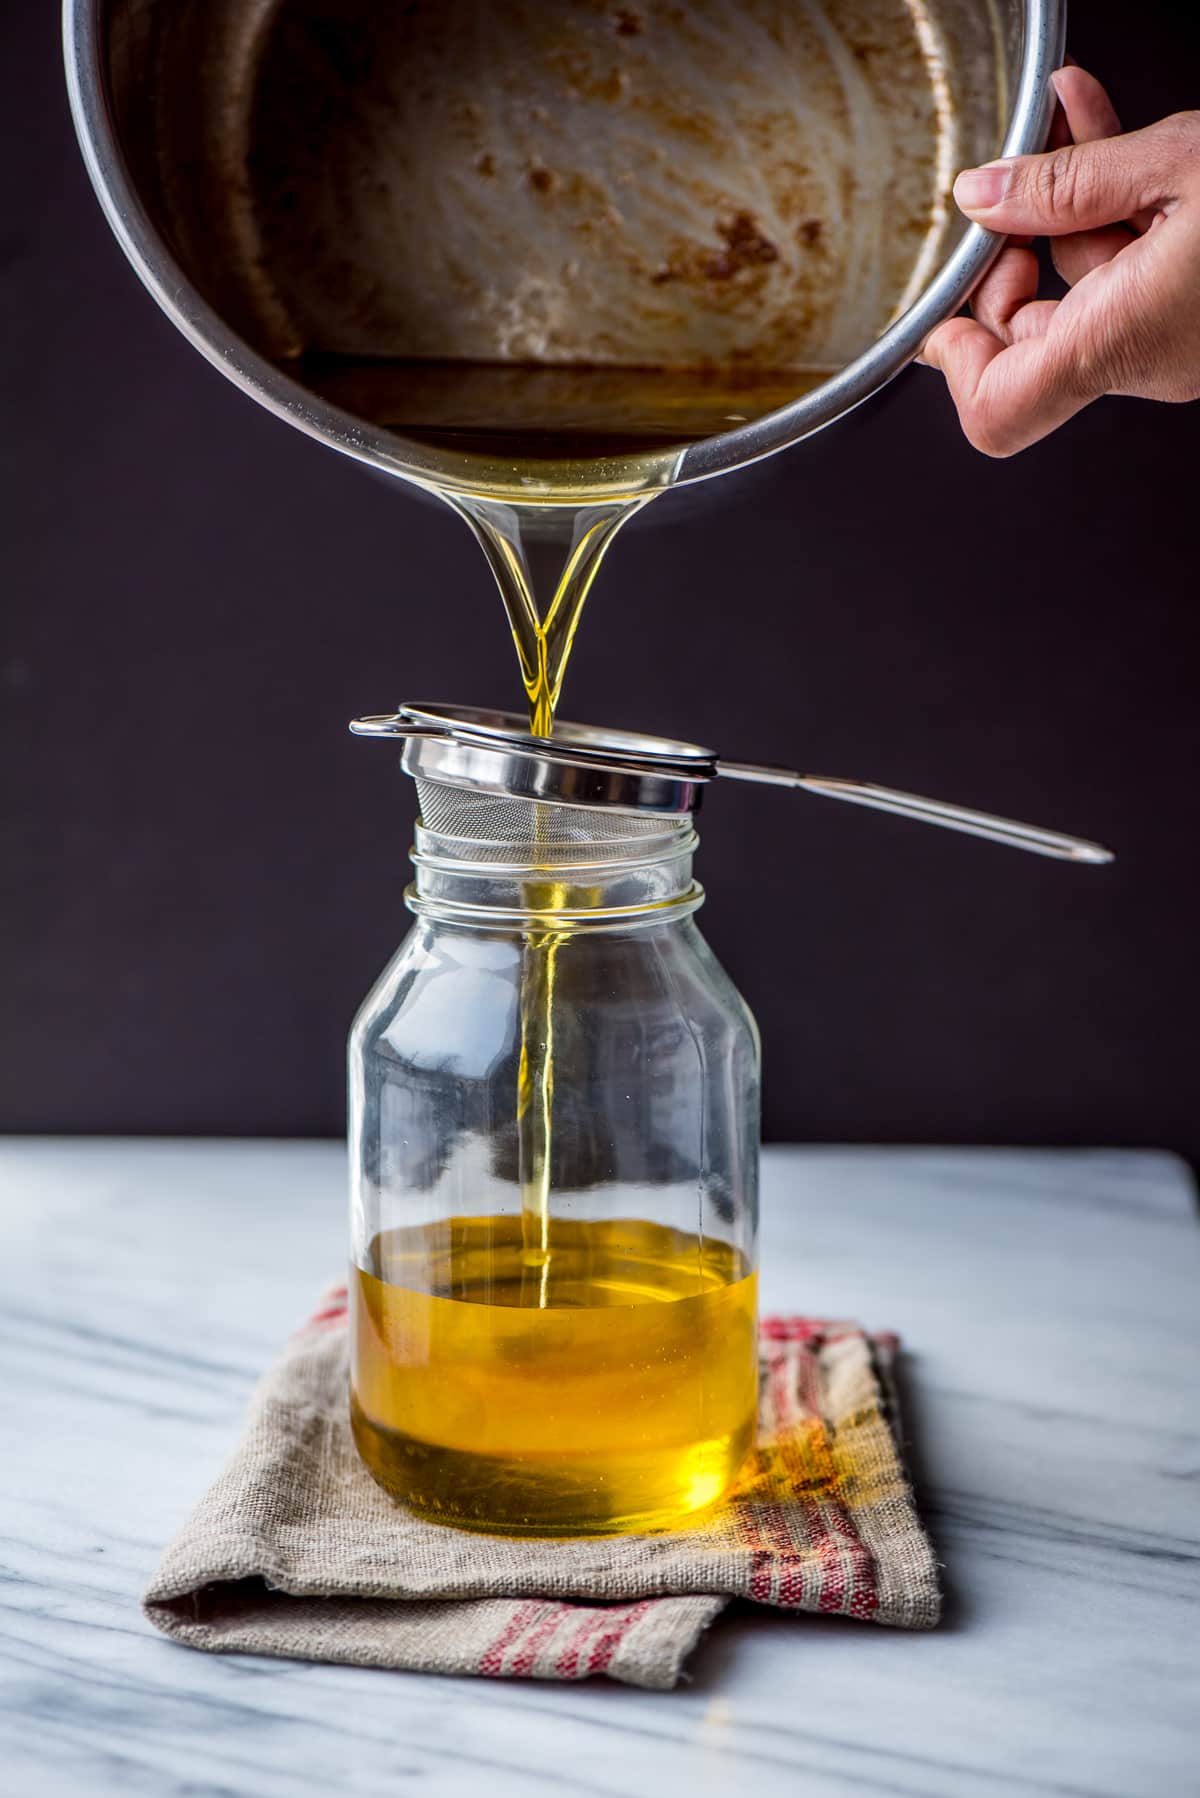
    • Let it cool for 5-10 minutes before straining into a glass jar. Apply the lid only after the ghee has completely cooled down.
    • Store it at room temperature for a month or refrigerate it for it to last longer.

    Video

    Notes

    It took me approximately 20 minutes to make ghee from 2 lbs of butter. Making 1lb of butter takes about 9-10 minutes. Though the times are provided, I would strongly recommend that you focus more on the visual cues rather than the clock because depending on the quality and temperature of the butter, cooking times may vary.

    Pantry EssentialsGetting the right tools for your kitchen makes cooking more enjoyable and less frustrating. Here's a list of kitchen essentials I own and recommend.

    Disclosure: This recipe contains affiliate links to products we love and recommend. As an affiliate, I earn from qualifying purchases.

    Nutrition

    Serving: 1tablespoonCalories: 102kcalCarbohydrates: 1gProtein: 1gFat: 11gSaturated Fat: 7gCholesterol: 30mgSodium: 101mgPotassium: 3mgSugar: 1gVitamin A: 355IUCalcium: 3mg

    Disclaimer: Approximate Nutritional information is provided as a courtesy and can vary depending on the exact ingredients/brands used. If you have health issues, please work with a registered dietician or nutritionist.

    Did you make this recipe?Take a photo and tag @simmertoslimmer on Instagram for a shoutout!
    Keyword : homemade
    Author : Anushree Shetty

    Ghee solidified after cooling down
    Ghee solidifies after cooling down

    Affiliate Disclosure: I am grateful to be of service and bring you content free of charge. To do this, some of the links on this post are affiliate links, which means that I may earn a commission (at no cost to you) if you click on the link or make a purchase using the link. I only recommend products that I use and love myself, so I know you’ll be in good hands. Your support in purchasing through these links goes towards maintaining this website. Thank you!

    Share
    Pin
    Tweet
    Yum
    Email

    About Anushree Shetty

    Hi! I am Anu - I combine my passion for food and photography to create easy, delicious, and visually appealing Indian-inspired recipes to inspire busy moms to cook more often at home.

    Previous Post: « Instant Pot Hard Boiled Eggs
    Next Post: Instant Pot idli – How to ferment batter and steam idlis using Instant Pot »

    Reader Interactions

    Comments

    1. Patricia says

      October 14, 2019 at 9:33 am

      Can you please add a link to the strainer and glass jar used in your ghee recipe? The strainer seems to perfectly fit your jar. Thanks for the recipe!

      Reply
      • Anushree Shetty says

        October 14, 2019 at 10:43 am

        Hi Patricia – I love this set – https://amzn.to/31dvvu9 (affiliate link) great value for money. If you just want the small one, here’s the link – https://amzn.to/2B7EiDc (affiliate link). Hope this helps.

        Reply
    2. Sandi says

      July 31, 2019 at 1:58 pm

      After making, and having it turn dark and toasty, I only rendered 1/2 cup. The first 2 times I made it, I got the FULL amount w/the first time turning out like the picture, and the second time turning dark. Sauté was set at Medium. Maybe cutting the butter up in small pieces made this happen instead of putting the whole block in at once? Please comment as to what I did wrong. Thank you!

      Reply
      • Anushree Shetty says

        August 01, 2019 at 2:37 am

        Sandy – did you use the same brand of butter both times? The moisture content varies by brand and can yield different results.

        Reply
        • Sandi says

          September 28, 2019 at 9:31 am

          Yes…. I used the same butter. I just needed to use the visual better and not the time. I’m having success again. Thanks!

    3. Sandi says

      July 31, 2019 at 1:46 pm

      The first time I made this, it was clear and beautiful. Twice since, It’s been kind of burnt and toasty (but I like it). What am I doing wrong? Sauté is set at medium.

      Reply
      • Anushree Shetty says

        August 01, 2019 at 2:19 am

        Sandi – look for the visual cues rather than the time like I mentioned in the post. Remove the steel insert from the Instant Pot when the ghee has turned clear and the milk solids have settled down.

        Reply
        • Sandi says

          September 28, 2019 at 9:30 am

          Thank you. The visual is better, and I’m now having success.

    4. Diane Lutz says

      June 15, 2019 at 5:19 pm

      Anxious to try making ghee. Will it work if I use salted butter? Thanks

      Reply
      • Anushree Shetty says

        June 16, 2019 at 5:03 pm

        Diane – it is best made with unsalted butter. The process will definitely work with unsalted butter and if you are okay with salty ghee – go for it.

        Reply
    5. Christina in SW FL says

      May 11, 2019 at 2:11 pm

      Anu, this is fantastic! I followed your directions to a T… had my doubts… boiling and not sinking solids.. freaked out a bit. I probably unplugged and plugged back in the Instant Pot 5 times. Long story short, the ghee turned out perfect! I did use a strainer and then strained again with a double layer of smooth, fine cotton kitchen toweling to get the last of the solids out of the ghee. I thank you very much.

      Reply
      • Anushree Shetty says

        May 11, 2019 at 2:55 pm

        Hi, Christina – thanks for your feedback. Appreciate it. I am so happy that my recipe worked for you 🙂

        Reply
    6. Wendy says

      November 16, 2018 at 8:15 am

      So does the whey simmer away since there is no skimming of the foam mentioned?

      Reply
      • Anushree Jayaram says

        December 18, 2018 at 9:34 pm

        Yes, Wendy. Sorry for the delay in response, your comment ended up in spam.

        Reply
    7. Dan says

      September 26, 2018 at 6:41 am

      Is there any advantage using an instant pot vs doing this on a stove top?

      Reply
      • Anushree Jayaram says

        September 29, 2018 at 11:41 pm

        Less splattering since the IP pot is deeper so I can do a larger amount using Instant Pot.

        Reply
    8. Lizarda says

      July 31, 2018 at 3:32 pm

      I used a pound of unsalted Kerrygold butter. After 40 minutes on Saute Normal, there was still plenty of froth, but the solids that had reached the bottom were very dark. I finally gave up and stopped the process.

      Reply
      • Anushree Jayaram says

        August 02, 2018 at 4:18 pm

        Hi there! Did you stir the ghee as outlined in step 2?

        Reply
    9. Shruti says

      March 23, 2018 at 4:43 pm

      4 stars
      Mine turned brown ? I think the problem I faced was I used 2 small blocks(1/2lb) and i was waiting for all the froth to go away even though I saw solids settling down. Also the solids turned brown quickly. Should I take out the IP liner as soon as I see the solids getting brown?
      Sorry this was my first time making ghee.

      Reply
      • Anushree Jayaram says

        March 23, 2018 at 8:11 pm

        Hi Shruti – Now that it has cooled down. How does it look? Unless it is not burnt, you are fine. I shut it off once it appears transparent and the ghee continues to cook or you could do it your way, wait till the milk solids turn brown and then remove the steel insert. Either way is fine. Let me know if you have any questions. Good job with your first attempt at making ghee!

        Reply
        • Shruti says

          March 23, 2018 at 8:54 pm

          Thanks Anushree. It looks beige in color after cooling down…it smells more nutty than ghee?.
          I guess I shouldn’t have waited for all the froth to disappear and should have removed it as soon as I saw the solids getting brown. Do you think soup setting would work better? And is it okay to remove it before all the froth disappears?
          Your step by step process actually motivated me to go for it. Thanks for posting such detailed recipe.

        • Anushree Jayaram says

          March 24, 2018 at 8:13 pm

          5 stars
          Hi Shruti – Don’t have to wait for all the froth to disappear. The key is to look for the milk solids sinking and the ghee turning transparent. My first attempt at ghee had similar results. The change happens in a split second. You’ll learn how to watch it closely with time :-). Can’t wait to see how your next batch turns up.

    10. Eti says

      January 12, 2018 at 4:29 pm

      Hello dear thanks for receipe ..I will surely try ..but can you give the process to make butter as well home made butter. Thank yiu

      Reply
      • Anushree Jayaram says

        January 15, 2018 at 12:51 pm

        Sure thing, I will post one soon.

        Reply
    11. Deepti says

      January 12, 2018 at 12:00 pm

      This looks super easy! Will surely give it a try. Love the way how you give suggestions on how to use the leftover milk solids 🙂

      Reply

    Liked the recipe? Leave a comment and let me know. Cancel reply

    Your email address will not be published. Required fields are marked *

    Recipe Rating


    Primary Sidebar

    Indian Food Blogger, Anushree Shetty

    Hi there, I am Anu!

    I love simplifying Indian food recipes without using highly processed ingredients. My goal is to inspire you to cook at home by sharing easy recipes that you can quickly make in your Instant Pot (or stovetop)...Read more

    A list of places where simmer to slimmer has been featured on

    Smoothie Recipes

    • Creamy Peanut Butter Banana Smoothie
    • 10+ Easy Smoothie Recipes That are Kid-Friendly
    • Kesar Pista (Saffron and Pistachio) Smoothie
    • Strawberry Banana Smoothie

    Simmer to Slimmer is a participant in the Amazon Services LLC Associates Program, an affiliate advertising program designed to provide a means for sites to earn advertising fees by advertising and links to Amazon.com.

    Footer

    A list of places where simmer to slimmer has been featured on

    About

    • Meet Anu
    • Contact
    • Portfolio
    • Privacy Policy
    • Terms & Conditions

    Recipes & Guides

    • Recipes
    • Instant Pot 101
    • Indian Food 101
    • Subscribe for recipes

    Blogging

    • How to start a blog
    • Blogging resources
    • Food Blogger Review

    As an Amazon Associate I earn from qualifying purchases.

    Copyright © 2020 Simmer to Slimmer